


Your fiberglass pool installation unfolds over 10 carefully orchestrated days. You’ll start with excavation and site preparation (days 1-2), followed by base setting and pool shell placement (days 3-4). Plumbing and electrical work occupy days 5-6, while backfilling, decking, and equipment setup fill days 7-9. On day 10, after final inspections and water chemistry balancing, you’ll be ready for your initial swim. Understanding each phase guarantees you’re prepared for this efficient transformation.
Key Takeaways
- Days 1-2 focus on excavation and site preparation, including digging 6-8 inches deeper for a crushed stone base.
- Days 3-4 involve setting the stone base, placing the fiberglass shell, and installing primary plumbing connections.
- Days 5-6 cover plumbing and electrical system installation, including PVC pipes, valves, skimmers, and GFCI-protected circuits.
- Days 7-10 comprise backfilling, basic landscaping, deck installation, and equipment setup for pool completion.
- Pre-installation planning with site surveys, permits, and detailed blueprints is essential before beginning the 10-day construction process.
The Pre-Installation Site Survey and Planning
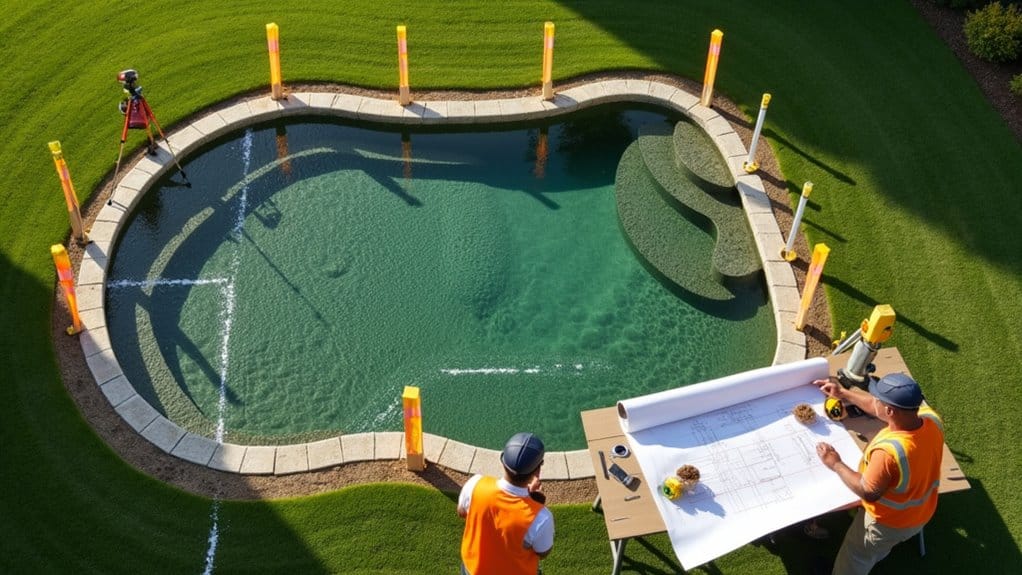
Before breaking ground on your fiberglass pool installation, a thorough site survey and detailed planning phase must be completed. During the site assessment, professionals will evaluate your property’s topography, soil conditions, and access points while identifying potential obstacles like utility lines, trees, or drainage issues. When finalizing your pool design, consider fiberglass pool painting tips to boost its look and lifespan. Proper prep and technique keep your pool attractive and well-protected for years.
The project planning stage involves creating detailed blueprints that specify your pool’s exact location, orientation, and elevation. You’ll need to secure necessary permits, schedule utility marking services, and establish a precise timeline for construction phases. Your contractor will determine equipment staging areas, material delivery points, and temporary storage locations. They’ll also develop contingency plans for weather delays and coordinate with subcontractors for electrical, plumbing, and landscaping work. This preparation guarantees a smooth installation process and helps prevent costly delays or complications.
Day 1-2: Breaking Ground and Excavation
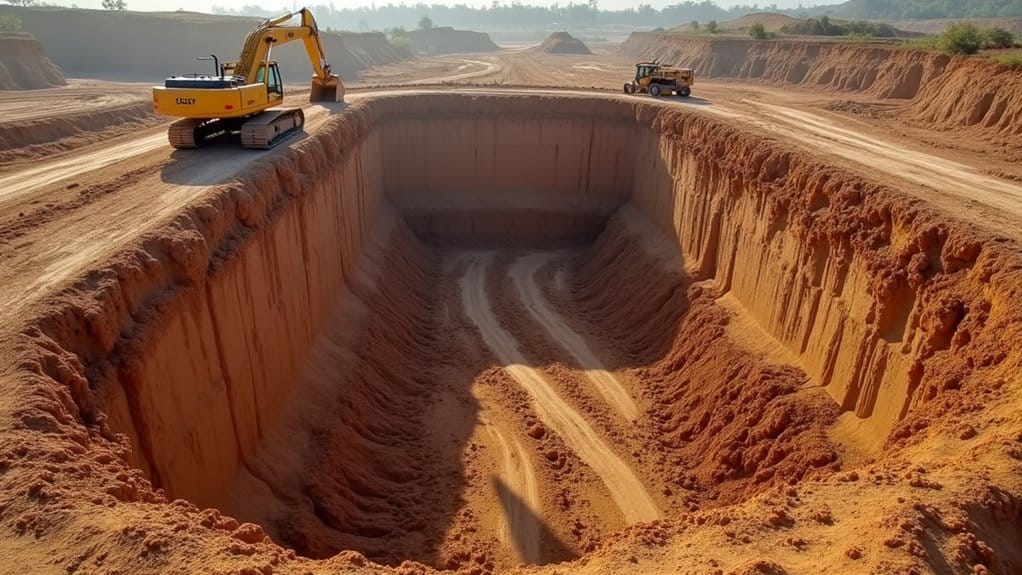
The initial 48 hours of your fiberglass pool installation focus on excavation and site preparation. During this phase, professional excavators will use specialized equipment to remove soil according to your pool’s exact specifications, typically digging 6-8 inches deeper than your pool’s height to accommodate the crushed stone base.
Modern excavation techniques guarantee precise dimensions and proper depth, while maintaining the integrity of surrounding soil structure. You’ll notice the crew paying careful attention to access paths, utility locations, and drainage patterns. They’ll create a slight slope away from your home and establish proper pitch for the pool shell.
Site preparation also includes compacting the soil and establishing clear access routes for delivery of materials and equipment, setting the foundation for the subsequent installation steps.
Day 3-4: Setting the Base and Pool Placement
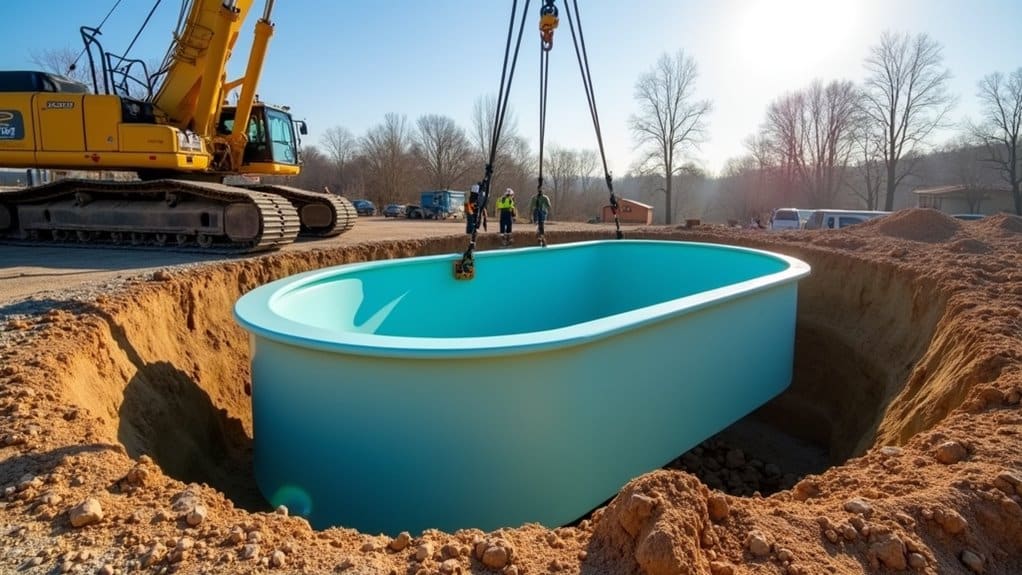
With excavation complete, crews move forward to establish a solid foundation for your fiberglass pool. The process begins with thorough base preparation, involving the installation of a crushed stone layer that’s carefully graded and compacted. This critical step guarantees proper drainage and prevents future settling issues.
Once the base achieves ideal compaction, crews will conduct precise pool leveling measurements using laser technology. You’ll see the arrival of your fiberglass shell via crane or excavator, followed by its careful placement onto the prepared base. Technicians will verify the shell’s position and level it within millimeter-precise tolerances. During this phase, they’ll also install the primary plumbing connections and verify the pool’s structural integrity before proceeding to the next installation stage. Once the shell is set, the fiberglass pool installation moves to backfilling with materials that provide support and drainage. A final inspection ensures all components are properly installed and working.
Day 5-6: Plumbing and Electrical System Installation
During these vital days, professional installers focus on establishing your pool’s complete circulation and power infrastructure. You’ll see the team installing high-grade plumbing materials, including PVC pipes, valves, and skimmers that connect to your pool’s filtration system. They’ll carefully position and secure these components to prevent future leaks or malfunctions.
The electrical connections require particular attention, as they power essential features like pumps, lights, and heating systems. Your installers will run conduit lines, install GFCI-protected circuits, and guarantee all wiring meets local safety codes. They’ll also mount the control panel in an accessible location and test each electrical component for proper function. This phase is critical for your pool’s long-term performance and safety, requiring precise measurements and professional-grade materials throughout the installation process.
Day 7: Backfilling and Initial Landscaping
On day seven, backfilling operations commence to stabilize your fiberglass pool shell and prepare the surrounding terrain for landscaping. You’ll observe specialized backfill techniques using gravel or sand, carefully compacted around the pool’s perimeter to prevent settling and guarantee structural integrity.
| Phase | Activity | Duration |
|---|---|---|
| Initial | Gravel placement | 2-3 hours |
| Middle | Compaction | 2-3 hours |
| Core | Water balancing | 1-2 hours |
| Edge | Grade preparation | 2-3 hours |
| Final | Basic landscaping | 3-4 hours |
Once backfilling is complete, your contractor will begin implementing basic landscaping options. This includes rough grading the surrounding area, establishing proper drainage slopes, and preparing the soil for future landscaping features. You’ll need to wait several days before adding permanent hardscaping elements like pavers or concrete decking.
Day 8: Deck Formation and Pool Coping
After the backfill has properly settled, day eight marks the critical phase of deck formation and pool coping installation. Your contractor will begin by preparing the perimeter for your chosen deck materials, which typically include concrete, pavers, or natural stone. They’ll establish proper drainage slopes and install reinforcement materials to prevent future cracking.
For pool coping options, you’ll see the installation of either standard aluminum, stone, or precast concrete pieces that cap the pool’s edge. These create a finished look while protecting your pool shell and providing a safe, non-slip surface for swimmers. Your contractor will guarantee precise measurements and proper sealing between the coping and deck to prevent water intrusion. The completion of this phase brings your pool project markedly closer to its final form.
Day 9: Equipment Setup and Water Chemistry
The ninth day brings the technical heart of your pool system to life. Your pool contractor will install and connect all essential equipment features, including the pump, filter, heater, and sanitization systems. They’ll guarantee proper flow rates and verify that all plumbing connections are secure and leak-free.
Once the equipment’s running smoothly, it’s time for initial chemical balancing. Your technician will test and adjust key water parameters: pH, alkalinity, calcium hardness, and sanitizer levels. They’ll also introduce the proper startup chemicals to prevent algae growth and establish a stable swimming environment. You’ll receive detailed instructions on maintaining these levels and operating your new equipment. This final preparation guarantees your pool water is safe, crystal clear, and ready for swimming by the next day.
Day 10: Final Inspection and First Swim
While your pool installation nears completion, Day 10 marks the crucial final inspection phase. Your contractor will conduct thorough checks to confirm everything meets safety and quality standards.
| Inspection Area | Key Checks |
|---|---|
| Safety Systems | Fencing, alarms, covers |
| Water Quality | pH, chlorine, alkalinity |
| Equipment | Pumps, filters, heaters |
Before your initial swim, you’ll need to verify that all necessary permits have been signed off and safety equipment is properly installed. Your contractor will demonstrate the operation of key pool features and provide maintenance instructions. Once the final inspection is complete and water chemistry is balanced, you’re cleared for your inaugural swim. Remember to keep the provided operation manual handy for future reference and maintain regular communication with your contractor during the warranty period.
Frequently Asked Questions
How Long Will My Fiberglass Pool Last Before Needing Replacement?
Your fiberglass pool can last 25-35 years when properly maintained. Key pool longevity factors include water chemistry balance, structural integrity, and protection from UV exposure. You’ll enhance lifespan by following essential maintenance tips: maintaining proper pH levels (7.2-7.6), regularly cleaning the filter system, and addressing surface repairs promptly. With professional installation and consistent care, you won’t need to contemplate replacement for several decades.
Can I Install a Fiberglass Pool During Winter Months?
While winter installation of fiberglass pools is possible, you’ll need to take into account specific temperature requirements. The ground can’t be frozen, and temperatures should stay above 40°F (4°C) for proper curing of materials. You’ll also need ideal conditions for concrete work and plumbing installation. If you’re in a region with mild winters, installation can proceed, but you’ll likely face extended timelines due to weather delays and limited daylight hours.
What Happens if It Rains During the Installation Process?
Rain during pool installation can create significant challenges, particularly during excavation. You’ll need to pause work if heavy rainfall occurs, as water-saturated soil becomes unstable and can collapse. Rain delays typically extend your installation timeline by 1-2 days per weather event. You’ll want to cover exposed areas with tarps and guarantee proper drainage around the excavation site. Your installer should monitor weather forecasts and adjust the schedule proactively to minimize disruptions.
Will My Homeowner’s Insurance Rates Change After Installing a Pool?
Yes, you’ll likely see insurance premium adjustments after installing a pool. Contact your insurance provider before installation to understand pool coverage specifics and potential rate changes. Most insurers consider pools an “attractive nuisance,” increasing liability risks. You’ll typically need to increase your liability coverage and may face a 10-30% premium increase. Be sure to verify requirements for safety features like fencing, which can affect your rates.
How Much Does the Pool’s Resale Value Depreciate Over Time?
Your pool’s resale value typically depreciates 7-10% annually, though several resale factors can influence this rate. You’ll see less depreciation if you maintain proper water chemistry, promptly repair equipment, and regularly update safety features. Location and market conditions also impact pool value – homes in warm climates tend to retain pool value better. To enhance long-term worth, you’ll need to invest in consistent maintenance and periodic renovations.