


You’ll eliminate fine debris by combining three strategies: maintain proper pump circulation and backwash when pressure rises 8-10 psi above baseline, use clarifiers during ideal water chemistry to electrostatically bond particles, and employ physical cleaning through brushing and slow vacuuming sweeps. Shock treatments periodically eliminate organics while enzyme-surfactant combinations lift oils from surfaces. Strategic sequencing of filtration, chemicals, and targeted cleaning prevents cloudiness before it becomes visible.
Understanding Fine Debris in Your Pool
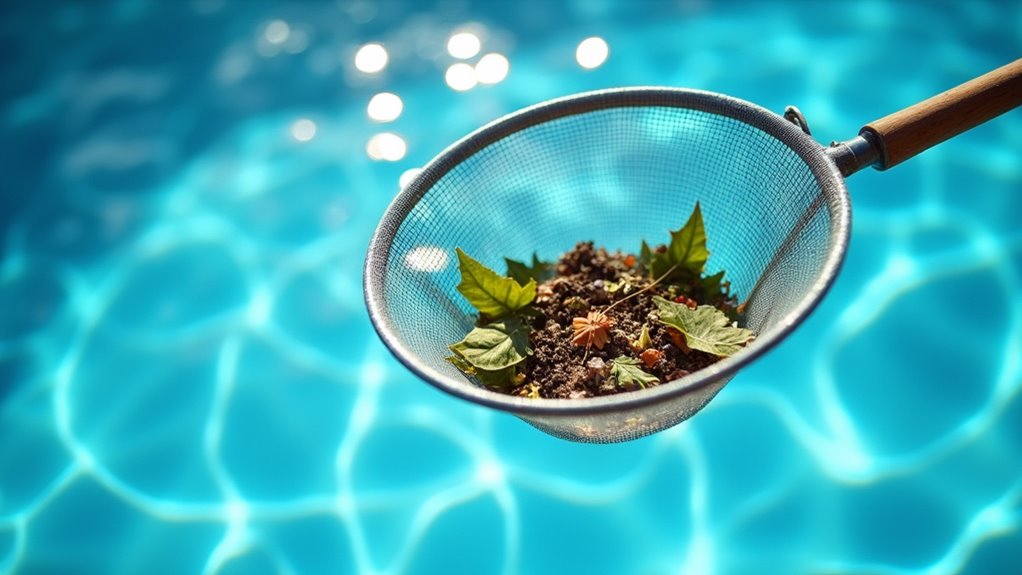
Fine debris, dust, pollen, sand, silt, hair, tiny insects, and organic particles, constantly enters your pool through windblown contamination, nearby landscaping, bather load (skin cells, hair, sunscreen), rain runoff, and filter malfunctions. You’ll notice its effects immediately: hazy water appearance, visible sediment on pool floors, and scum buildup at the waterline.
Understanding settling behavior challenges is critical for effective removal. Fine particles don’t stay suspended; they rapidly sink to pool bottoms and accumulate in low-circulation areas, evading your skimmer entirely. This creates detection difficulties since micro-debris remains invisible until it clusters visibly. Running a pump approximately 8 hours daily helps circulate water through your filter to capture some of these suspended particles before they settle. When fine debris settles on pool surfaces, it can disrupt water balance and create breeding grounds for bacteria and algae. Enzymes are particularly effective at breaking down organic debris by destroying the molecules that cause hazy water and react with chlorine, which reduces your sanitizer’s disinfection effectiveness.
Organic debris compounds the problem by reacting with chlorine, increasing sanitizer demand and promoting algae growth. You’ll need to distinguish fine debris from sand or algae by observing how particles disperse when brushing surfaces. Proper identification guides your removal strategy.
Filter and Pump System Basics
Now that you understand how fine debris settles and accumulates in your pool, you’ll need to know how your filtration system works to remove it effectively. Your pump serves as the heart of this system, drawing water through skimmers and main drains before pushing it toward your filter. The spinning impeller creates vacuum pressure that moves water through suction lines into the strainer basket, which catches large debris initially. Proper pump operation is crucial for effective water circulation and filtration.
For proper plumbing configuration, water must flow sequentially through your pump, filter, heater, and chemical feeder before returning to the pool. Basic pump maintenance includes monitoring your pressure gauge, when readings rise 8-10 psi above normal, you’ll need to clean your filter. The skimmer collects floating debris such as leaves and bugs before they sink to the bottom of the pool, preventing them from reaching your main filter system. Different filter types including cartridge, sand, or diatomaceous earth options will determine how effectively fine particles are captured from your water. Maintaining this system properly reduces chemical usage by up to 30 percent while effectively capturing fine debris.
When and How to Backwash Your Filter
Once your filter pressure gauge rises 8–10 psi above its clean baseline, you’ll need to backwash your filter to restore its effectiveness. Start by shutting off your pump completely, then attach a backwash hose to the waste port. Rotate your multiport valve to “Backwash” and restart the pump.
Run the backwash cycle for 2–5 minutes, adjusting backwash duration based on sight glass clarity. When water runs clear, stop the pump and switch to “Rinse” mode for 20–60 seconds to settle media and remove loose debris. Regular backwashing maintains filter efficiency and prevents the buildup of dirt and contaminants in your system. Backwash approximately once a fortnight to keep your filter operating at peak performance.
For DE filters, replenish DE powder through your skimmer after backwashing. Monitor filter pressure regularly; cloudy water or weak return jets also signal backwashing needs. Clogged filters decrease efficiency and lead to health risks if not properly maintained. Consistent filter pressure monitoring prevents efficiency loss and extends media lifespan.
Using Clarifiers for Particle Bonding
You’ll bond fine debris particles by introducing positively charged clarifier polymers that electrostatically attract negatively charged colloids, clumping them into filterable aggregates. You should dose your clarifier based on your pool’s volume and contamination level, typically following manufacturer guidelines for PolyDADMAC or enzyme-based formulations, and apply it during optimal water chemistry conditions (pH 7.4–7.6, alkalinity 80–120 ppm). You’ll need to run your pump at approximately 75% capacity with strategic return jet placement to guarantee thorough mixing, then allow several days for gradual filtration and clarification, repeating treatments as necessary for heavily soiled pools. Clarifiers work more slowly than flocculants because the filter removes coagulated debris over days rather than sinking immediately to the pool bottom. Flocculant polymers uncoil in water to lasso multiple particles together, creating larger floccules that settle more efficiently. A properly operating pool filter is essential for clarifier success, as clarifiers do not destroy particulate matter but rather prepare it for removal through filtration.
How Clarifiers Bond Particles
Why do clarifiers actually work when other methods fail? They employ electrical attraction; positively charged polymer molecules bond to negatively charged suspended particles through cationic interactions. This charge density effects mechanism neutralizes surface charges, causing debris to lose mutual repulsion and agglomerate.
| Clarifier Type | Charge Mechanism | Best For |
|---|---|---|
| PolyDADMAC | Ionic bonding | Inorganic particles |
| Polyacrylamides | Polymer chains | Colloidal debris |
| Enzyme-based | Chemical breakdown | Organic residues |
Longer polymer chain reactions create tight clusters, transforming microscopic particles (under 1 micron) into larger, filterable flocs. You’ll notice these aggregates form rapidly during circulation. Standard pool filters then capture bonded clusters efficiently, improving clarity without excessive pressure buildup on your system. Unlike flocculants which work almost immediately, clarifiers are milder chemicals that take several days to completely clear up a cloudy pool. For optimal results, apply clarifiers in the evening to allow consistent overnight circulation and maximize particle bonding during low-usage periods.
Dosing and Application Schedule
Now that you understand how clarifiers bond particles into filterable flocs, getting the dosage right determines whether you’ll achieve crystal-clear water or waste product. Dosage consistency prevents under-treatment and product waste. Follow your manufacturer’s label closely, typical maintenance requires 1 oz per 6,000 gallons weekly, though cloudy water demands 1 oz per 4,000 gallons every 48 hours.
Application technique optimization starts with pre-treatment: balance pH (7.4–7.6) and alkalinity (80–120 ppm), clean your filter, and remove debris. Dilute clarifier in a bucket of pool water before adding it near a return jet with the pump running. Never pour directly into the skimmer.
After application, run your filter continuously for 6–8 hours. Maintain gentle circulation and vacuum any settled layer to waste if needed.
Enzyme Treatments and Surface Tension
Enzymes work most effectively when paired with surfactants, which diminish water’s surface tension and allow contaminants to move in the direction of the surface where enzymes can break them down. Your surfactant selection directly impacts treatment productivity. Lower surface tension enables oils and organic matter to lift from pool surfaces and the bottom, making them accessible to enzymatic breakdown.
| Feature | Without Surfactants | With Surfactants |
|---|---|---|
| Surface Tension | High | Reduced |
| Contaminant Accessibility | Limited | Expanded |
| Scum Line Formation | Likely | Prevented |
Enzyme surfactant combinations improve the overall cleaning efficiency by working synergistically. You’ll notice faster debris mobilization and more effective organic decomposition. This pairing minimizes foaming while maximizing water clarity and reducing your chemical load substantially.
Brushing Your Pool Walls and Surfaces
You’ll stir fine particles into suspension by brushing your pool walls and surfaces with firm, consistent strokes aimed at the main drain. Remove wall and tile debris by focusing on high-risk zones like steps, corners, behind ladders, and shaded areas where contaminants accumulate. This brushing preps your pool for vacuuming and filtration, allowing suspended particles to be captured by your equipment rather than settling back onto surfaces.
Stir Particles Into Suspension
Because fine debris and dust settle on pool surfaces where they can’t be reached by your filtration system alone, brushing is essential for stirring these particles back into suspension. When you brush your pool walls and floors, you dislodge accumulated contaminants and suspend surface contaminants, allowing your filtration system to capture them effectively.
Use a pool brush with bristles suited to your pool type: nylon for vinyl or fiberglass, stainless steel for concrete. Apply firm, overlapping strokes from walls downward to floors, paying special attention to corners and steps where debris accumulates. Work systematically to guarantee complete coverage without missing areas.
Perform brushing immediately before vacuuming to optimize particle suspension. This preparatory step also enables distribute chemical exposure by exposing hidden contaminants to your water treatment system, enhancing sanitizer effectiveness and maintaining water clarity.
Remove Wall and Tile Debris
While fine debris suspended in your pool’s water gets captured by filtration, contaminants that settle on walls and tiles require direct removal through brushing. Use a firm but gentle technique, brushing from the waterline downward to the pool floor for thorough coverage. Focus on corners, steps, and behind ladders where stubborn buildup accumulates.
Select appropriate brushes based on your pool surface: nylon bristles for plaster and concrete, soft brushes for vinyl to prevent damage. For tile and grout cleaning, employ melamine sponges to address stubborn grime at waterlines. Weekly brushing prevents surface discoloration prevention and inhibits algae growth, preparing surfaces for chemical treatments and enhancing the overall pool cleanliness and maintaining your pool’s appearance long-term.
Prepare Before Vacuuming and Filtration
How can you guarantee your brushing efforts deliver maximum debris removal? You’ll need to prepare strategically before vacuuming and filtration begin.
First, ensure your pump’s running during brushing to establish proper water circulation and prevent localized circulation issues that trap debris. Clean your skimmer baskets and verify your filter’s functioning correctly, clogging defeats your purpose.
Check particle adhesion patterns on pool surfaces. Vigorous brushing disturbs these patterns, suspending fine debris throughout the water column. This suspended material will flow more readily into your main drain during filtration cycles.
After brushing, inspect your filter system carefully. Newly dislodged debris requires adequate filtration capacity. If necessary, backwash or clean filters before running your vacuum.
Schedule brushing immediately before vacuuming to capitalize on suspended particles while they’re still circulating effectively.
Selecting the Right Debris Removal Tools
When you’re addressing fine debris in your pool, choosing the right equipment makes all the difference between spending hours on manual labor and maintaining crystal-clear water efficiently. You’ll want to invest in specialty filtration cartridges designed for trapping dust, pollen, and sand; these optimize your system’s fine particle capture. Consider pairing robotic cleaners with pressure-side units, which collect debris in separate bags rather than clogging your main filter. For surface work, fine-mesh skimmer nets outperform standard equipment when addressing floating particles. Incorporate pool surface agitation techniques using nylon brushes to dislodge stubborn particles before vacuuming. Evaluate your pool’s size and debris type: smaller pools with light debris benefit from suction-side cleaners, while larger pools with mixed debris demand robotic or pressure-side solutions.
Vacuuming Techniques for Floor Sediment
Once you’ve selected your debris removal tools, proper vacuuming technique determines whether you’ll actually collect fine sediment or simply stir it back into suspension. Use long, slow sweeping strokes with a rotating vacuum pattern to methodically cover your pool floor without agitating particles. Overlap each pass to eliminate untreated zones where debris accumulates.
Maintain steady suction control throughout your vacuuming session; rapid movements disperse fine matter throughout the water column, counteracting your collection efforts. Pause periodically to empty your pump strainer basket, preserving suction strength during extended operations.
When using the waste setting for heavy sediment removal, monitor your pool’s water level continuously. Fine particles cannot pass through filter media, so the waste setting prevents clogging by bypassing your sand filter entirely. Remember to return your multiport valve to the filter position once you’ve completed waste vacuuming.
Chemical Treatment Sequencing
You’ll start your chemical treatment by running an enzyme purge to break down organic compounds that trap fine debris, then follow with clarifier application once the enzyme’s cycle completes. Your treatment timing sequence matters critically, you must space each chemical supplement by 4–6+ hours, beginning with alkalinity and pH adjustments before moving to shock treatment and flocculant. After the flocculant binds particles into larger clumps, you’ll vacuum immediately while your filter circulates to capture settled debris before it re-suspends.
Enzyme Purge First
Because non-living organics like body oils, lotions, and plant debris interfere with your sanitizer’s effectiveness, you’ll want to deploy an enzyme purge before applying clarifiers or algaecides. This sequencing optimizes organic matter removal and reduces subsequent demand for shock treatments and algaecides, creating a more efficient chemical regimen.
Start your enzyme purge during low-swimming periods. Distribute the enzyme solution evenly across the pool surface or pour it into the skimmer, then run your pump system for 6–8 hours minimum. Once circulation completes, begin enzyme activity monitoring using appropriate test kits to assess residual enzyme levels.
After the purge, conduct thorough pool chemistry adjustment by testing pH, alkalinity, and sanitizer levels. As your organic load decreases, rebalance chemicals accordingly. Follow up with weekly maintenance dosing to sustain enzyme presence and performance.
Clarifier Application Process
After your enzyme purge completes, it’s time to build on that foundation by introducing a clarifier suited to your specific pool type and filtration system. Dilute your concentrated clarifier in a bucket of pool water, then pour it around the perimeter with your pump running. Apply near return jets to facilitate dispersal and prevent localized overdosing.
| Application Factor | Best Practice | Why It Matters |
|---|---|---|
| Timing | Avoid direct sunlight/wind | Prevents degradation |
| Distribution | Around perimeter + skimmer | Guarantees uniform coverage |
| Bather presence | No heavy use periods | Prevents ingestion |
Run your filter continuously for 8–24 hours post-application. Conduct pool water testing to establish baseline clarity, then perform clarifier effectiveness assessment after filtration completes. Backwash your filter to remove accumulated floc and maintain system efficiency.
Treatment Timing Sequence
Getting your pool chemistry right hinges on following a precise chemical addition sequence that prevents dangerous reactions and optimizes treatment effectiveness. You’ll establish your chemical balancing protocols through systematic testing frequency before introducing any compounds.
- Test water conditions initially, then adjust total alkalinity (80–120 ppm) using sodium bicarbonate or muriatic acid
- Balance pH (7.2–7.6) with soda ash or pH reducer, allowing 30 minutes to several hours for circulation
- Correct calcium hardness (200–400 ppm) and add cyanuric acid stabilizer before introducing chlorine
You’ll introduce sanitizer only after alkalinity, pH, hardness, and stabilizer reach target levels. Operate your filtration pump continuously during and after chemical addition for thorough distribution. This sequencing prevents erratic pH readings, scaling, corrosion, and guarantees your chlorine functions efficiently.
Maintenance Strategies for Long-Term Clarity
Achieving long-term pool clarity requires you to maintain equilibrium across four interconnected systems: chemical balance, physical cleaning routines, filtration efficiency, and preventative treatments. You’ll implement shock treatments periodically to eliminate bacteria and organic contaminants that regular chlorination misses. Metal sequestrants bind minerals, preventing cloudiness and filter clogging caused by metal accumulation.
You should establish structured maintenance schedules using checklists to prevent oversights. Monthly equipment inspections catch wear early, while seasonal maintenance safeguards systems from damage. Schedule partial water changes to dilute accumulated contaminants and metals.
Document your service logs and use reminder systems, digital or manual, to guarantee consistency. By coordinating chemical management, physical cleaning, and filtration with preventative additives, you’ll sustain crystal-clear water while minimizing fine debris accumulation and system strain.
Frequently Asked Questions
How Long Does It Typically Take to Restore Water Clarity After Heavy Debris Contamination?
You’ll typically restore water clarity within 24–48 hours when you execute proper filtration and chemical treatment. Your mechanical filtration efficiency directly impacts this timeline; continuous pump operation removes suspended particles based on debris settling patterns. You should run your filter continuously, perform regular backwashing, and apply superchlorination at shock levels. You’ll accelerate results by vacuuming fine debris to waste and using flocculants. However, severe contamination may require multiple cleaning cycles extending beyond two days.
Can Fine Particle Nets Be Used in Combination With Standard Skimmer Baskets for Better Results?
Yes, you’ll absolutely benefit from combining fine particle nets with standard skimmer baskets as supplementary skimming devices. You can use fine particle nets as dedicated pre-filters, removing microscopic debris before it reaches your skimmer basket. This two-stage approach amplifies your debris capture efficiency. You should alternate between both tools, using slow, steady passes with the fine net, then emptying your skimmer basket frequently. This combination drastically reduces strain on your main filtration system.
What Is the Ideal Water Temperature Range for Optimal Clarifier and Enzyme Product Effectiveness?
You’ll achieve ideal clarifier and enzyme product effectiveness when you maintain your pool water between 75–80°F. At this temperature range, you’ll experience perfect enzyme application time and proper dosage concentration that optimizes chemical reaction rates. Warmer conditions accelerate how clarifier polymers bind to suspended particles, facilitating faster settling. You’ll want to monitor temperature fluctuations closely, as they directly impact your treatment’s duration and filtration efficiency. Run your filters for 24 hours post-application for best results.
Should Pool Shock Treatment Be Applied Before or After Enzyme Purge Procedures?
You should apply pool shock treatment before enzyme purge procedures. Your pre shock protocol considerations include lowering pH and applying non-stabilized chlorine initially to eliminate algae and bacteria. You’ll then apply phosphate remover after shocking, waiting at least 8 hours before adding enzyme purge as your final step. Your post enzyme maintenance schedule involves monitoring circulation, vacuuming debris, and checking water clarity within 24 hours for best results.
How Frequently Should Leaf Traps Be Cleaned During Peak Pollen and Debris Seasons?
During peak pollen and debris seasons, you should empty your leaf traps daily as part of your regular maintenance schedule. However, you’ll need to increase this frequency to multiple cleanings daily if they’re filling quickly due to seasonal debris fluctuations. Check baskets after storms or windy days immediately. Overflowing traps signal you’ve underestimated cleaning needs. You’ll prevent filter clogs and circulation strain by staying vigilant with this critical task.