


You’re looking at a system where a flexible PVC liner creates your waterproof barrier against the pool’s structural walls. Water circulates continuously through skimmers and main drains, moving via your pump through plumbing lines back into the pool through return jets. This circulation maintains even chemical distribution and clarity. You’ll manage pH, chlorine, and alkalinity regularly to keep everything balanced. Understanding each component’s role, from the liner’s vacuum-sealed fit to your equipment’s synchronized operation, reveals how all these elements work together seamlessly.
The Basic Structure of a Vinyl Pool
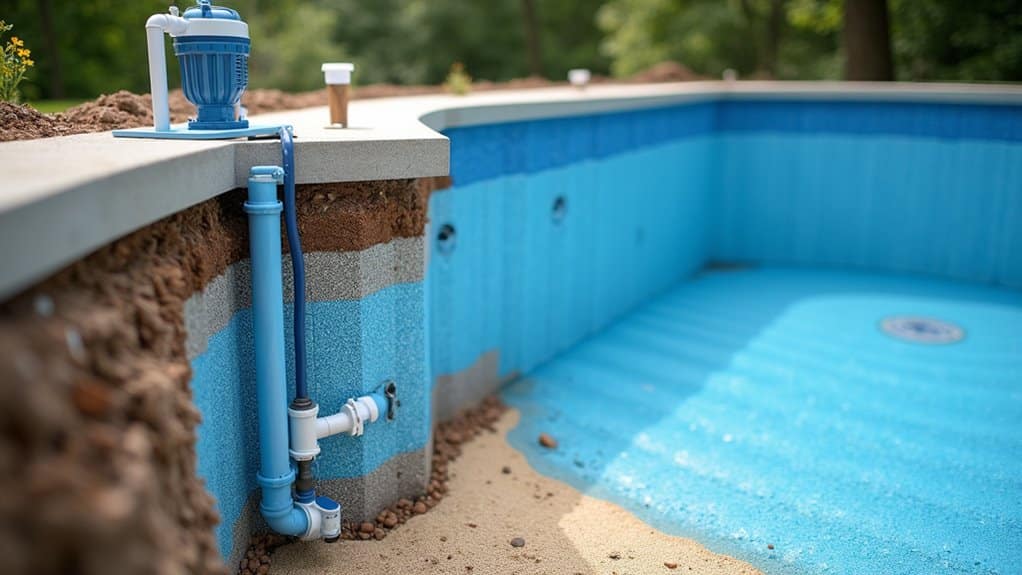
To understand how a vinyl pool functions, you’ll need to grasp its fundamental components, each playing a critical role in the pool’s structural integrity and performance. Panel construction forms your pool’s perimeter using steel, aluminum, or polymer materials. Steel delivers superior strength, while aluminum resists corrosion and polymer offers lightweight installation benefits. These panels bolt together and brace for stability, typically standing 42 inches high to establish standard shallow-end depth.
Beneath your liner sits the pool base, a critical foundation layer using vermiculite, sand, concrete, or grout-cement mixtures. Vermiculite’s material properties blend minerals with Portland cement, creating a softer, forgiving surface that prevents liner wrinkling and extends durability. The vinyl liner material is then carefully installed over this foundation to create a waterproof barrier between the pool water and structural components. Custom-made vinyl sheets are precisely fitted and secured across the top of the pool structure to ensure proper water containment. Thicker liners provide enhanced durability and puncture resistance compared to standard options.
Your pool integrates steps, benches, and ladders before liner placement, ensuring seamless entry and exit points. Ultimately, coping and decking complete the structure, securing your liner while providing functional poolside space and proper drainage.
How the Vinyl Liner Functions
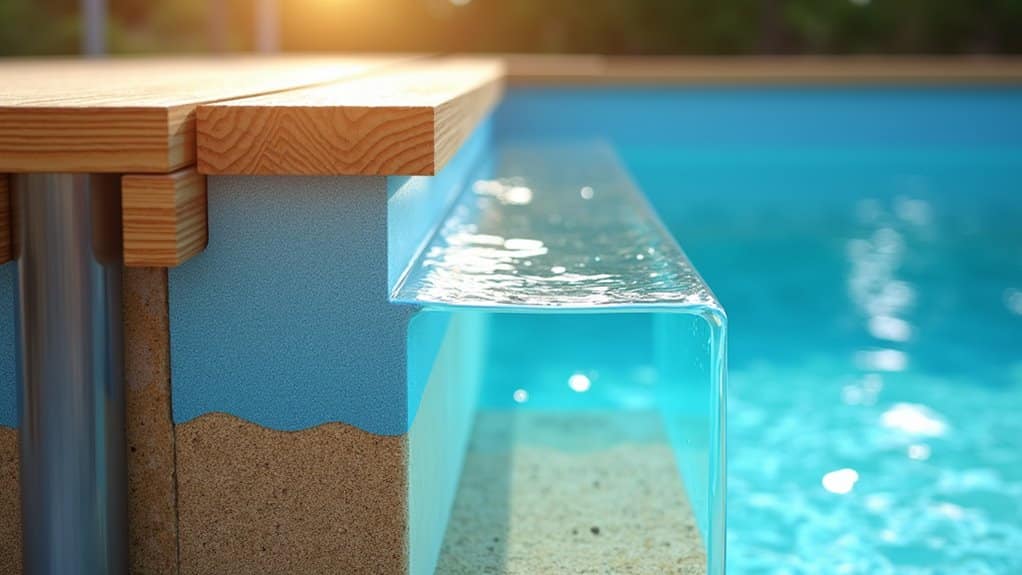
How does a thin sheet of plastic keep your pool watertight? Your vinyl liner creates a continuous waterproof membrane across your pool’s floor, walls, and steps. Made from polyvinyl chloride (PVC) or similar polymers, it resists water penetration entirely. The liner’s flexibility allows it to conform seamlessly to custom pool shapes without gaps or wrinkles.
During installation, you custom-fit the liner to your pool’s exact dimensions, then vacuum-seal it for a snug fit. The beaded edge snaps into your pool’s track, securing it firmly in place. Faceplates and gaskets around openings prevent water from bypassing the barrier. Vinyl liners come in various thicknesses, with thicker options providing greater resilience against punctures and wear. While vinyl liners offer a cost-effective installation option, they require periodic replacement to maintain their waterproofing integrity. Most vinyl liners typically last 5-9 years before requiring replacement due to wear and tear.
| Feature | Benefit | Duration |
|---|---|---|
| UV inhibitors | Extended lifespan | 8–12 years |
| Thickness (20–30 mils) | Liner durability | Improved resistance |
| Calcium carbonate | Chemical resistance | Long-term performance |
| Vacuum sealing | Wrinkle prevention | Maintained integrity |
| Smooth surface | Puncture resistance | Reduced damage risk |
The Excavation and Foundation Process
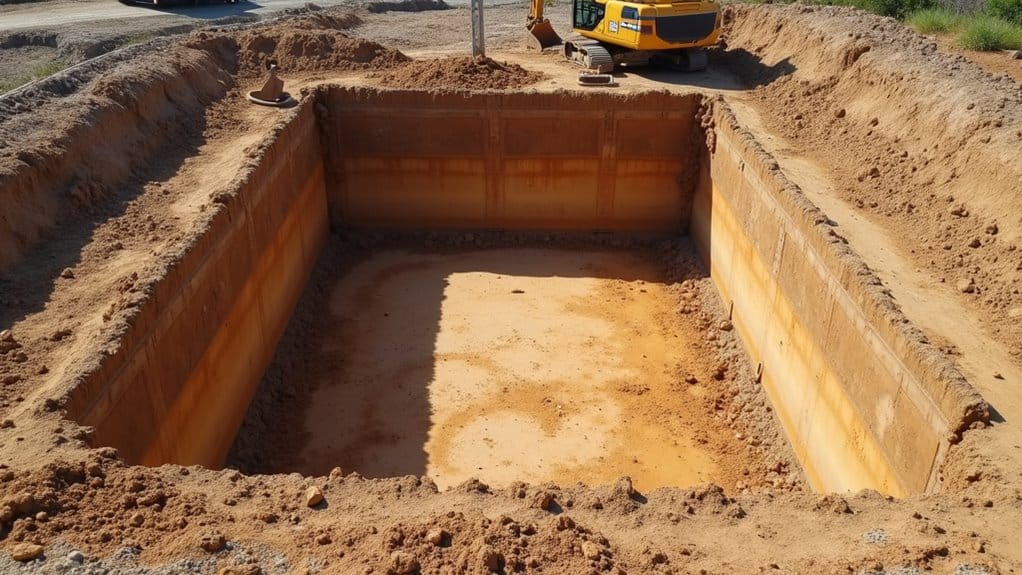
You’ll begin by excavating a hole that matches your pool’s dimensions and depth, starting with the deep end and removing obstructions like boulders or stumps. Next, you’ll level and grade the excavated area using a laser level to guarantee a uniform foundation, then compact the subsoil with a plate compactor to minimize settling risks. Before excavation begins, contact Dig Alert to mark any known public utilities on the property to avoid damaging underground infrastructure. The excavation process typically takes an average of 1 day to complete once utilities have been properly marked. Ultimately, you’ll install concrete footings around the pool’s perimeter to anchor and support the wall structure once the vinyl liner’s support system is in place. Following these meticulous planning and precise operation steps ensures your vinyl pool foundation meets all regulatory requirements and provides a stable, code-compliant base for successful pool installation.
Creating the Foundation Hole
Before any digging begins, you’ll need to conduct a thorough site survey and identify all underground utilities to prevent costly damage and safety hazards. Next, mark your pool layout precisely using stakes or paint according to your blueprint, then secure all required local permits.
Once you’re ready to excavate, heavy machinery like mini-excavators removes soil to depths 9–12 inches below your desired base. You’ll shape the hole to match your design specifications, including steps and hoppy areas. Remove obstacles like rocks and roots for a clean cavity. A 6 inch lip is commonly included in the over dig to allow working room for setting forms.
Your compact soil preparation and groundwater management are critical. Compact and grade the subgrade to specified contours for stability. Store removed soil temporarily for backfilling, or haul it away. This phase typically takes 1–2 days for residential pools.
Leveling and Ground Preparation
Once the foundation hole is excavated, precise leveling and ground preparation become essential to prevent structural complications and liner damage. You’ll use laser levels and string lines to achieve accuracy across all corners and movement. The importance of soil composition directly impacts your pool’s longevity; rocky or loose soil requires additional stabilization through compaction or pavers. Installing metal braces and supports beneath the pool structure reinforces the foundation and prevents shifting over time. Proper concrete foundation installation ensures a sturdy and durable base that will support the entire pool structure for years to come.
| Preparation Step | Method | Purpose |
|---|---|---|
| Rough Grading | Eliminate high/low spots | Create level surface |
| Soil Compaction | Layer-by-layer compression | Guarantee stability |
| Sub-Base Installation | Sand/gravel (12-18″) | Cushion and drainage |
You’ll prepare the ground for structural stability by installing fill materials in 6–12 inch lifts, compacting between layers. This prevents settling and wall misalignment. Periodic inspections throughout the process confirm compliance with specifications, confirming your vinyl pool foundation withstands years of use.
Concrete Footing Installation
How does a vinyl pool foundation withstand years of hydrostatic pressure and structural stress? You’ll install a concrete footing that anchors your entire pool structure.
You’ll excavate trenches 44.5 inches deep, then inspect them before pouring. Soil stabilization matters here, unstable clay or sandy soils require additional preparation. You’ll position rebar placement according to engineering specs, reinforcing the concrete for added strength.
You’ll pour an 8-inch-deep concrete collar around the perimeter, vibrating it to eliminate air pockets and solidify a strong bond with wall panels. This footing secures wall panel footings into hardened concrete, preventing any shifting. The wall panels made of steel, plastic, or aluminum are bolted together and secured to this concrete foundation.
After 24–48 hours of curing, you’ll carefully backfill with non-expansive material, using hand compaction near walls. This stabilized foundation supports all subsequent pool installation phases.
Installing Plumbing Systems
You’ll excavate trenches from your pool structure to the equipment pad at a depth of 18-24 inches to meet frost protection and local code requirements. Your trench layout must position the main drain and skimmer lines strategically, with returns placed on opposite ends for even water circulation, while you maintain proper separation between electrical conduit and plumbing pipes per code specifications. Before backfilling, you’ll have your trenches inspected and approved by local authorities to verify correct layout and regulatory compliance. Measure from your equipment pad to the skimmer, main drain, returns, and other plumbing lines to determine the exact quantities of pipe and fittings you’ll need for the installation.
Trench Layout and Design
Before you install a vinyl pool’s plumbing infrastructure, you’ll establish the trench layout with precision, and this foundation determines whether your circulation system operates efficiently for years to come.
You’ll extend trenches 15″ beyond pool dimensions to accommodate walls and backfill. Using string lines, laser levels, and Dig Spec drawings, you’ll mark the perimeter and corners, guaranteeing diagonals are equal. Standard trench width requires 2’6″ offset on each side past inside pool dimensions. The Dig Spec drawing provides finish dimensions that exclude over dig allowances, so you’ll need to reference your inground installation guide for additional digging instructions and elevation planning.
| Component | Depth | Slope | Purpose |
|---|---|---|---|
| Main drain | 2″ below grade | 1/4″ per foot | Flow efficiency |
| Return lines | Below frost line | Consistent gradient | Freeze prevention |
| Skimmer trenches | Per blueprint | Toward drainage | Circulation |
| Step connections | Customized depth | Grade-specific | Plumbing integration |
Your precise trench placement ensures main drains, skimmers, and returns align strategically. The backfill preparation sequence protects pipes with sand bedding while maintaining structural integrity during panel installation.
Code Compliance and Inspection
Once your trenches are properly laid out and backfilled, you’ll need to guarantee the necessary permits and prepare for multiple inspection checkpoints before you can proceed with plumbing installation.
Navigate the permit application process by submitting detailed plans to your local building department. You’ll require separate permits for pool construction, electrical work, and plumbing systems. Municipal inspection protocols demand verification at critical stages:
- Initial site inspection confirms zoning compliance and proper drain field positioning
- Trench inspection verifies depth, slope, and material specifications
- Rough plumbing inspection checks all connections before burial
- Final inspection validates system integrity and code adherence
Consult with your local county or municipality, as additional requirements often surpass state codes. These inspections confirm your vinyl pool’s plumbing operates safely and functions reliably throughout its lifespan.
Electrical Wiring and Safety Features
Proper electrical installation forms the foundation of vinyl pool safety, requiring strict adherence to the National Electrical Code (NEC) and local building codes. You’ll need a dedicated 240-volt circuit with appropriately rated wire gauge for your pool pump, protected by GFCI circuit breakers that immediately cut power during ground faults.
You must install weatherproof enclosures and outlets to shield equipment from moisture and physical damage. Continuous bonding connects all metal components, rails, ladders, and equipment, creating a low-impedance path that reduces shock risk from stray voltage. A licensed electrician must complete your installation and place the outlet within three feet of your pump; extension cords are prohibited.
You should perform routine inspections and replace damaged wiring promptly to prevent fire hazards. Regular GFCI testing confirms operational safety.
Securing the Liner in Place
You’ll secure your vinyl liner using a track and fastening method that locks the liner’s bead into the coping base, preventing shifting when water pressure builds. Next, you’ll use a commercial vacuum inserter positioned 4″-6″ from the pool floor to draw the liner tight against walls and eliminate wrinkles before permanently securing fixtures. This two-stage process, mechanical fastening and vacuum sealing, ensures your liner stays centered and wrinkle-free under the weight of hundreds of thousands of gallons.
Tracking and Fastening Method
After the liner’s positioned and smoothed into place, you’ll secure it using a bead receiver track system that runs continuously around the pool’s perimeter. This method guarantees proper liner tensioning and effective water pressure management throughout your pool’s lifespan.
- Press the factory-formed bead at the liner’s top edge into the rigid PVC track manually or by snapping it into place, creating a watertight seal.
- Install liner locks or snap-in covers over the bead within the track for added security, preventing the liner from popping out under pressure.
- For pools with steps or benches, secure step strips over the liner edge using screws and rubber gaskets to prevent leaks.
- At main drain and skimmer locations, cut holes in the liner, apply gaskets, then tighten screws until the plastic creaks slightly.
Vacuum Sealing Process
How does a vinyl liner remain perfectly conform to your pool’s contours without wrinkles or gaps? You’ll insert a vacuum hose behind the liner, typically near the skimmer, then seal all air gaps with duct tape. Heavy-duty shop vacuums extract trapped air, creating a suction-cup effect that rapidly conforms the liner to your pool structure. You’ll monitor continuously for wrinkles and air pocket detection, smoothing problem areas by hand as the vacuum tightens the liner. For large or irregularly shaped pools, you may need multiple vacuums for even suction. Keep vacuums running until at least 3–6 inches of water accumulate in the shallow end. This proper sequencing guarantees the liner achieves a permanent, secure fit against all contours.
Filling and Water Circulation
Before activating your pool’s filter system, you’ll need to fill the vinyl liner pool to its proper water level, a critical step that prevents equipment damage and guarantees skimmers and main drains function effectively during circulation.
Once filled, your circulation system achieves full capacity operation through these key stages:
- Skimmers collect surface debris while main drains positioned at the pool floor create suction through the pump
- The pump generates both suction and pressure, moving water through suction-side plumbing in the direction of filtration
- Filtered, pressurized water returns via return jets with adjustable eyes for directional flow regulation
- Positioning returns in consistent directions (clockwise) promotes circulation system efficiency and prevents stagnant zones
After reaching full capacity, begin water chemistry testing and LSI balance adjustments. This methodical approach secures optimal filtration performance and water quality maintenance.
Chemical Balance and Water Treatment
Once your vinyl pool’s circulation system reaches full capacity, maintaining proper chemical balance becomes essential to safeguard your liner and ascertain safe, clear water. You’ll monitor six critical parameters: pH (7.4–7.8), total alkalinity (100–150 ppm), calcium hardness (200–400 ppm), free chlorine (1–4 ppm depending on heating), cyanuric acid (30–50 ppm), and saturation index (-0.1 to +0.4).
Your water chemistry adjustments stabilize these levels using pH increasers or decreasers, alkalinity modifiers, and calcium chloride. Chlorine stabilization through cyanuric acid prevents UV degradation, upholding sanitizer effectiveness. Regular shock treatments oxidize organic contaminants and support chlorine performance. Testing twice weekly guarantees balanced water that protects equipment, prevents scaling and corrosion, and keeps swimmers safe from bacteria and viruses.
Regular Maintenance Requirements
Because your vinyl pool’s longevity and performance depend on consistent upkeep, you’ll need to establish a thorough maintenance routine that addresses cleaning, liner care, equipment servicing, and seasonal adjustments.
- Daily surface skimming removes floating debris, preventing excess debris buildup and reducing filtration strain.
- Weekly vacuuming and brushing target pool bottoms, walls, corners, and steps using vinyl-safe equipment to minimize algae and biofilm formation.
- Regular inspections of your liner for wrinkles, tears, and brittle spots catch early wear signs at seams and corners where leaks commonly occur.
- Equipment maintenance includes checking filtration flow, cleaning pump baskets, replacing filter media, and inspecting hoses for leaks.
The importance of regular cleaning extends your liner’s lifespan while maintaining ideal water circulation and chemical balance throughout your pool system.
Lifespan and Replacement Considerations
While your vinyl pool’s structural components can serve you for 20–25 years, the liner itself won’t last nearly as long. You’ll typically need replacement every 7–10 years, though exceptional maintenance can extend this to 20 years.
| Factor | Impact | Lifespan Effect |
|---|---|---|
| UV Exposure | Accelerates deterioration | Reduces by 30–40% |
| Water Chemistry | Degrades material | Shortens 2–3 years |
| Installation Quality | Affects durability | Extends or shortens markedly |
Watch for cracks, tears, fading, and loss of elasticity; clear replacement indicators. Environmental factors like tree roots and debris cause unpredictable damage, requiring early intervention.
You’ll invest $2,000–$5,000 for in-ground liner replacement, with labor costs separate. Implement liner maintenance tips including proper chemical balance and protective covers. Compare cost-effective replacement options by analyzing warranty coverage (typically 5–20 years, prorated) and installation fees across providers.
Frequently Asked Questions
How Much Does a Vinyl Pool Cost Compared to Concrete or Fiberglass Pools?
You’ll find vinyl pools most affordable upfront at $40,000–$70,000, vastly undercutting concrete ($80,000–$120,000+) and fiberglass ($55,000–$100,000). However, you must factor long-term costs. Over 10 years, you’ll spend $50,000–$90,000 total with vinyl due to liner replacements every 8–10 years ($4,500–$6,000 each). Concrete demands $99,500–$147,500 because of resurfacing and maintenance intensity. Fiberglass ($63,000–$112,000) balances lower material longevity concerns with minimal installation complexity and maintenance, offering superior value despite higher initial investment.
How Long Does the Complete Vinyl Pool Installation Process Typically Take?
You’ll typically complete your vinyl pool installation in 4–8 weeks, though some projects finish in as little as 2–4 weeks post-excavation. Your site preparation requirements, including excavation, soil inspection, and permit approval, usually take 1–2 weeks. You’ll then proceed through structural assembly, utility installation, and liner fitting, which span several supplementary weeks. Weather conditions, soil complexity, and subcontractor availability can extend your timeline, but vinyl pools remain markedly faster than concrete alternatives.
Can Vinyl Pool Liners Be Repaired if They Get Punctured or Torn?
Yes, you can repair vinyl pool liner punctures and tears using patch kits designed for this purpose. You’ll need to clean the damaged area thoroughly, cut patches at least 2 inches larger than the tear, and round the corners. For small tears under 2 inches, you can handle repairs yourself; however, larger tears benefit from professional repair services. Applying firm pressure and weighting the patch for 24 hours guarantees robust durability and sealing strength.
What Climate Conditions or Weather Factors Affect Vinyl Pool Performance and Longevity?
You’ll find that UV exposure and temperature variations are your liner’s primary adversaries. Intense sunlight accelerates color fading and brittleness, while freeze-thaw cycles cause contraction and cracking. High humidity promotes mildew growth, and imbalanced water chemistry, exacerbated by acidic rain, softens vinyl membranes. You’ll extend your liner’s lifespan by consistently using pool covers, maintaining proper winterization, and balancing water chemistry regardless of your region’s climate challenges.
Are Vinyl Pools Suitable for All Yard Sizes and Landscape Types?
Yes, vinyl pools suit most yard sizes and terrain types when you plan properly. You’ll customize wall materials, steel, aluminum, or polymer, to match your ground and soil conditions. Your landscaping requirements determine feasibility; you’ll need minimum 1,200 square feet for smaller pools. Freeform designs accommodate irregular shapes, trees, and slopes. However, you should consult professionals about your homeowner preferences and local zoning before installation to guarantee appropriate sizing.