


Installing a fiberglass pool shell involves five critical phases: Begin with thorough site assessment and permit acquisition, followed by precise excavation and ground preparation. You’ll then need to carefully position and level the shell while installing plumbing systems. Next, execute strategic backfilling with gravel layers while monitoring shell alignment. Finally, complete the installation with proper surface finishing and safety features. Mastering each phase guarantees your pool’s longevity and performance for decades to come.
Site Assessment and Ground Excavation
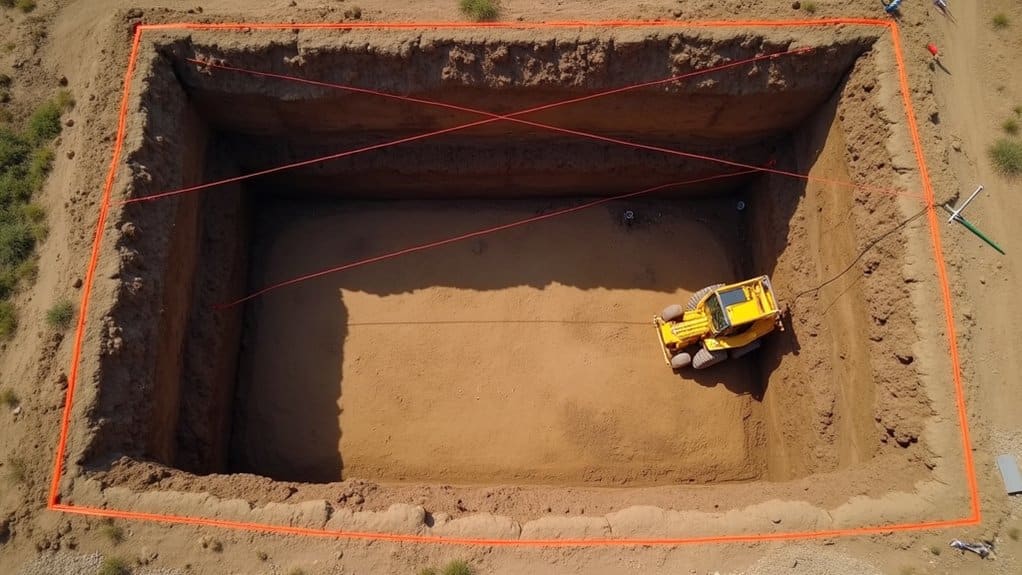
Before breaking ground on your fiberglass pool installation, a thorough site assessment and proper excavation planning are critical for success. Begin with a detailed soil analysis to evaluate stability, composition, and drainage patterns. You’ll need to map all utility lines and assess terrain challenges that might require specialized equipment. Obtaining proper building permits must be completed before any excavation work can begin. Pool installation projects often require heavy machinery access to transport and position equipment efficiently during excavation. Implementing safe slope gradients is essential to prevent soil sliding during the excavation process.
Mark your pool’s exact dimensions and verify the excavation precisely matches your fiberglass shell measurements. You should allocate 1-2 days for digging, depending on site complexity. Clear all access points for construction equipment and remove any obstructions before excavation begins. Prior to digging, conduct safety audits, inspect for overhead power lines, and mark potential hazards. Remember to maintain proper soil compaction throughout the process and create a level base using appropriate gravel or sand materials for stabilization.
Precise Shell Placement and Leveling
Proper shell placement and leveling serve as the cornerstone of a successful fiberglass pool installation. You’ll need to establish precise shell alignment using a laser level system and multiple reference points across the excavation site. Deploy hydraulic cranes for controlled lowering while monitoring the shell’s position relative to your pre-marked guidelines. Site drainage conditions must be verified before final placement to prevent future water accumulation issues. The installation process requires custom pool shells that are specifically designed for optimal fitting and placement. Industry standards dictate that pools must maintain a one-inch tolerance across every 40 feet of length.
| Action | Tool Required | Tolerance |
|---|---|---|
| Initial Setup | Laser Level | ±1/8 inch |
| Shell Lowering | Hydraulic Crane | ±1/4 inch |
| Final Position | Metal Shims | ±1/2 inch |
Apply leveling techniques systematically, using non-flexible shims for permanent corrections and maintaining a maximum deviation of ½ inch across rigid structures. You’ll need to perform incremental adjustments while continuously monitoring alignment. Remember to backfill in 6-inch layers while partially filling the pool to maintain stability and prevent unwanted movement.
Critical Plumbing and Electrical Setup
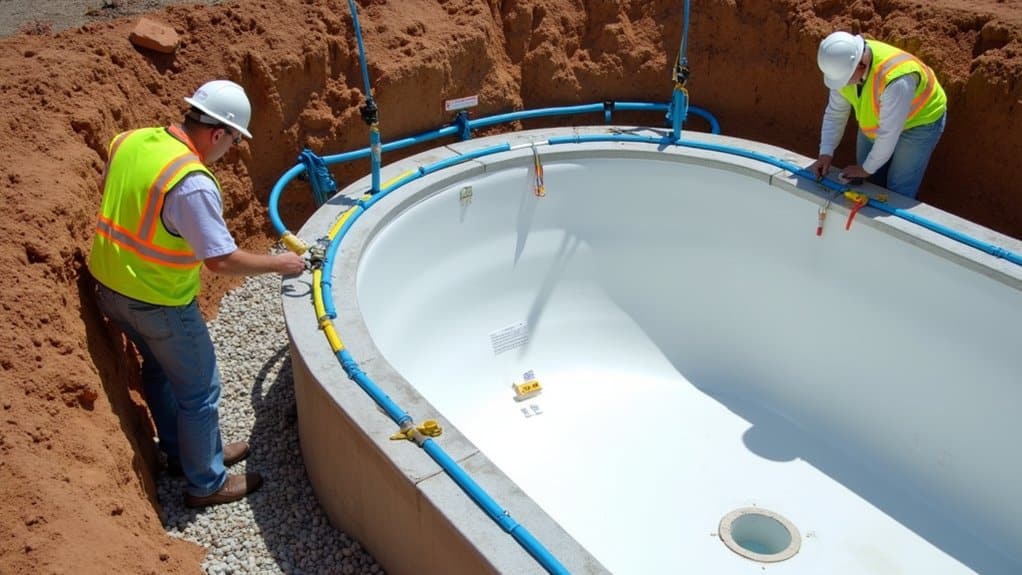
Once the pool shell is secured, you’ll need to establish a thorough plumbing and electrical infrastructure that meets strict safety standards and operational requirements. Install rigid PVC plumbing materials throughout the system, securing them with proper brackets to prevent settling-induced leaks. Route underground lines away from the shell and position your equipment pad strategically for ideal circulation. Using quality gravel backfill around plumbing lines instead of sand can prevent up to 75% of common plumbing issues. Pre-formed shells make the plumbing installation much more straightforward compared to concrete pools. The installation process typically takes 1 to 3 days to complete with professional builders.
Conduct extensive pressure testing using air or nitrogen for 48+ hours before concrete work begins. For electrical safety, install GFCI-protected circuits and separate electrical lines from plumbing to prevent cross-contamination. Use appropriate wire gauges for pump and heater loads, ensuring all components are properly grounded. Have a licensed electrician verify code compliance before operation. Remember to leave adequate slack in plumbing lines for future maintenance and establish a clear path to your equipment pad for servicing.
Strategic Backfilling Operations
While the pool shell sits securely in place, strategic backfilling operations must begin with precise material selection and layering techniques. Material durability and drainage efficiency depend on using properly graded aggregates, with a 6-inch sand foundation layer followed by ½-inch gravel backfill. Crane positioning must be maintained during initial backfilling stages to ensure stability and prevent shell movement. Pool level adjustments need to be made continuously as the water and backfill are added simultaneously. Local permits should be readily available for inspection during the installation process.
Proper material selection and strategic layering form the backbone of successful pool backfilling, ensuring lasting durability and optimal drainage performance.
Your backfilling process must follow these critical steps:
- Start at the deepest point, alternating 6-inch layers of gravel with corresponding water levels to maintain pressure equilibrium.
- Gently compact each layer while monitoring shell alignment and checking for any irregularities or deformation.
- Install plumbing components and electrical conduits as you progress, guaranteeing proper integration without compromising the shell’s structural integrity.
Remember to conduct pressure tests on plumbing lines and verify shell alignment throughout the backfilling process. This systematic approach prevents settling issues and guarantees long-term stability.
Final Surface and Safety Features
The final surface and safety features of your fiberglass pool require careful consideration to guarantee long-term durability and code compliance. You’ll need to choose between traditional gelcoat and modern ecoFINISH materials for your final surface, with polyFIBRO® offering enhanced flexibility and durability. These pre-finished surfaces come in various colors and eliminate the need for secondary plastering common in concrete pools. Single sealed shells ensure minimal maintenance requirements compared to other pool types. A properly maintained fiberglass pool surface can exceed 25 years of reliable service. The compacted gravel base provides essential support for the shell’s longevity and structural integrity.
For safety features, you’ll incorporate pre-molded steps and seating areas during the initial manufacturing phase. During the coping and deck installation, you’ll need to address proper handrail placement and lighting integration. The multi-layered construction provides structural integrity, while vinyl ester resin creates an essential moisture barrier. Ascertain all electrical components are correctly bonded during the plumbing phase to meet safety standards.
Frequently Asked Questions
How Long Does a Properly Installed Fiberglass Pool Shell Typically Last?
Your fiberglass pool shell will typically last 25-30 years with standard care, though you can extend this to 40+ years through proper maintenance requirements. Durability factors like chemical balancing, UV protection, and regular inspections play essential roles in longevity. You’ll find that high-quality installations backed by manufacturer warranties can push lifespans to 50-60 years in ideal conditions. Professional maintenance and climate protection will maximize your pool’s structural integrity.
Can Fiberglass Pools Be Installed During Winter Months?
Yes, you can install fiberglass pools during winter months, though you’ll face specific challenges. Cold weather installations require careful planning and specialized equipment like ground heaters and thermal blankets. You’ll need to monitor ground temperatures closely and may experience delays due to frozen soil or winter precipitation. While it’s technically feasible, you’ll likely encounter extended timelines and additional costs compared to warm-weather installations due to weather-related adjustments and safety measures.
What Happens if Tree Roots Grow Near the Pool Shell?
Tree roots won’t penetrate your fiberglass pool shell, but they’ll grow around it. While structural integrity isn’t compromised, you’ll need enhanced pool shell maintenance due to increased organic debris from nearby trees. For effective tree root management, maintain a 15-20 foot distance between trees and your pool. If trees are closer, consider installing root barriers. You’ll face more frequent cleaning requirements, but you won’t experience leaks or structural damage from root proximity.
Does Pool Shell Color Affect Water Temperature Maintenance?
Yes, your pool color greatly affects temperature maintenance. Darker shells (deep blue, black, gray) absorb more solar radiation, increasing water temperature through greater heat retention. You’ll find that lighter colors (white, light blue) reflect sunlight, keeping water cooler. The temperature impact is amplified by fiberglass’s low thermal conductivity (0.04 W/mK). Darker shells typically maintain more stable temperatures and can reduce heating costs by 15-20% through passive heating.
Can an Existing Concrete Pool Be Replaced With Fiberglass?
While you can convert a concrete pool to fiberglass, this pool renovation comes with significant installation challenges. You’ll need to verify structural compatibility, repair existing cracks, and guarantee proper bonding between materials. The process typically costs more than new installations due to demolition requirements and complex modifications. You’ll also face potential risks of delamination if the resin doesn’t properly adhere to the concrete surface. Professional expertise is essential for this conversion.