


Installing your large above-ground pool requires careful planning and precise execution. You’ll need to assess your property, obtain permits, and prepare a level site with proper drainage. Next, create a sand foundation, assemble the frame and track system, and install the walls and liner components. Set up your filtration equipment and safety features, then complete the landscaping around your pool. Following these key steps in sequence will guarantee a successful and lasting installation. Fill the pool gradually to prevent structural stress. Following the installing above ground pool instructions ensures all parts are correctly set up, and learning proper maintenance keeps the pool in great condition year-round.
Assessing Your Property and Obtaining Permits

Before installing an above-ground pool, you’ll need to thoroughly evaluate your property and obtain the necessary permits from local authorities. Start by checking your local zoning regulations to confirm pool installation is permitted in your area. You’ll need to measure and mark your intended installation site, ensuring proper setbacks from property lines and structures, typically 10 feet minimum. While personal property status makes above-ground pools easier to finance, proper installation is still crucial. Maintaining sun exposure is essential when selecting your pool location to maximize enjoyment and water temperature. Structural soundness is a primary consideration during the planning phase to ensure FHA compliance.
Create a detailed plot plan showing your pool’s location, dimensions, and distances to property lines. Pay special attention to fencing requirements, as most municipalities mandate specific heights and self-closing gate mechanisms for safety compliance. You’ll also need electrical permits for pool pumps and lighting. Check for underground utilities, drainage patterns, and potential obstructions in your chosen location. Consider seasonal factors and equipment placement when finalizing your pool’s position.
Preparing and Leveling the Installation Site
Before breaking ground for your above-ground pool, you’ll need to measure and mark a space that extends at least 2 feet beyond your pool’s dimensions to accommodate essential equipment and maintenance access. You’ll then systematically clear the marked area of all vegetation, rocks, branches, and other debris that could compromise the pool’s foundation. After thorough clearing, you must meticulously level the base area using appropriate tools like a laser level or string level system, ensuring no more than a 1-inch variance across the entire surface. Consider installing a weed barrier fabric between the ground and foundation material to prevent unwanted plant growth and enhance stability. Be sure to wait for warm, dry weather to begin your site preparation work to prevent potential property damage and installation delays. Using masonry grade sand creates an ideal smooth surface for your pool’s base and helps prevent damage to the liner.
Measuring Your Ground Space
Proper ground measurement and preparation represent three critical phases of above-ground pool installation: measuring, leveling, and obstacle assessment. You’ll need to mark your pool’s center point using a stake or rebar, then measure outward 13 feet for a standard 24-foot pool, allowing extra workspace. Using measuring tools with ground accuracy, secure string around the marked perimeter with rocks to prevent shifting. For added security during site preparation, consider implementing protective measures similar to those used by professional pool websites to safeguard against potential issues. Windy conditions should be avoided during the measuring and marking process to ensure accuracy.
Before proceeding, you’ll need to dig a uniform two-inch depth across the entire area after achieving perfect levelness. Check for potential obstacles like underground utilities, tree roots, or drainage issues that could affect installation. Remember to verify local regulations regarding fencing and drainage requirements. Maintain at least one foot of clearance beyond your pool’s diameter to guarantee proper workspace for equipment and materials during installation.
Clear and Remove Debris
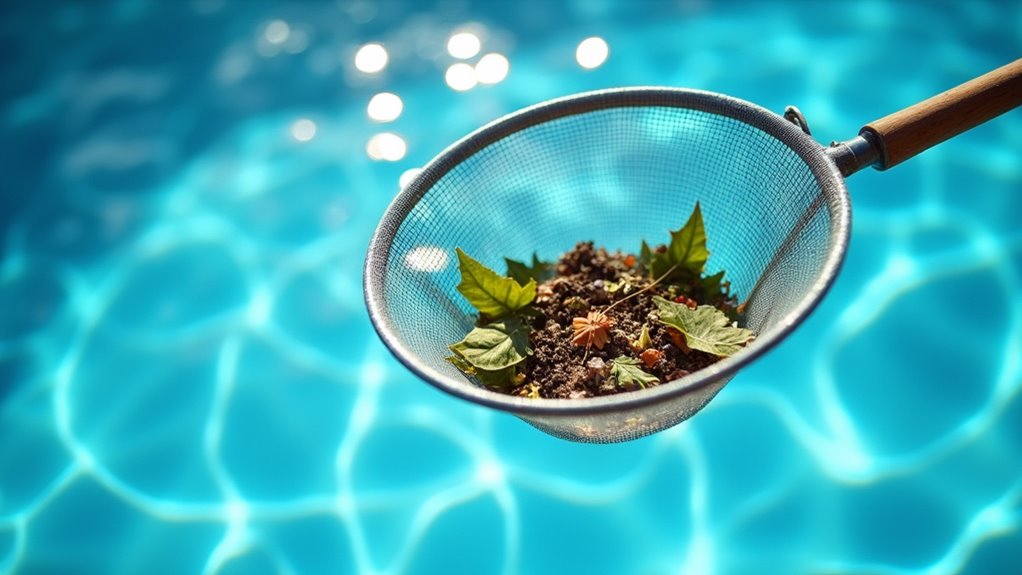
Once you’ve marked your installation area, clearing the site of all potential hazards and debris becomes your critical first step. Begin debris removal by eliminating all turf, vegetation, and groundcover that could interfere with your pool’s foundation. Remove any sharp stones, protruding roots, or old construction materials that might puncture your liner.
During site preparation, inspect the area thoroughly for buried utilities or cables. If you encounter any access issues during preparation, contact the site owner with your Cloudflare Ray ID for prompt assistance. You’ll need to establish a stable base by applying mason sand as your foundation layer, followed by crushed stone for proper drainage. Install protective foam padding or commercial pool pads to create a uniform cushioning surface. Don’t forget to position your mason sand within 10-20 feet of the installation site and verify it’s properly compacted for stability.
Level the Base Area
After clearing the site of debris, establishing a perfectly level base becomes your next major task. Among essential pool leveling techniques, you’ll need to mark the pool’s perimeter using stakes and twine, ensuring precise measurements match manufacturer specifications. Deploy a laser level to assess elevation across the site, addressing any slope issues to maintain less than 1 inch per 12 feet of grade. You can rotate the leveling arm like a clock face to systematically check for uneven spots across the entire installation area.
Key site preparation essentials include:
- Using a center stake with swivel arm to verify consistent radius measurements
- Applying base material in 2-3 inch layers, compacting thoroughly with a mechanical tamper
- Installing pool-specific padding after allowing 24-48 hours for soil settlement
For ideal stability, compact all filled areas systematically, and verify levelness after each pass. Don’t rush this critical phase, as proper leveling directly impacts your pool’s structural integrity and longevity.
Creating a Solid Foundation With Sand Base
Creating a solid foundation starts with five essential ground preparation steps that guarantee your above-ground pool’s stability and longevity. First, you’ll need to spread a 3-inch layer of fine sand across your pool’s base area, ensuring sand durability through even distribution. Use a rake or trowel to maintain consistent thickness, then compact the sand thoroughly with a mechanical tamper. The sand must be free of rocks and other debris to prevent potential liner damage. Undisturbed earth must be confirmed before adding any sand layers to ensure proper stability.
Next, construct a 4-inch angular cove at a 45-degree slope where the floor meets the walls, reaching a total height of 7 inches for ideal cove stability. Use a template to shape the cove precisely, and verify wall alignment is flush against it. Complete your foundation by performing a final inspection – check for level surfaces, remove any remaining debris, and test the cove’s integrity by applying pressure.
Assembling the Pool Frame and Track System

Begin assembly by connecting the bottom track sections with T-plates, ensuring each joint aligns perfectly with your marked perimeter points. You’ll need to level each support post base using a spirit level and 5″ x 5″ decking blocks, making precise adjustments to compensate for any ground irregularities. For online installation assistance, be aware that certain technical phrases may trigger security blocks when accessing support websites. Once the bases are level, connect the vertical support posts to the bottom track using 3/8″-16 x 1″ hex bolts, maintaining exact 90-degree angles while progressively working your way around the pool’s circumference. Following manufacturer’s instructions carefully, use appropriate screwdrivers and wrenches to ensure all hardware connections are properly tightened. Consider adding a sand layer beneath the track to provide additional stability and prevent shifting during installation.
Align Bottom Track Sections
The bottom track sections serve as the foundation for your above-ground pool’s structure and require precise alignment for proper installation. Start by laying out the bottom tracks on your leveled surface, ensuring proper spacing between each section according to your manufacturer’s specifications. Verify each track slides correctly into the bottom plates and measure the length in the center groove to confirm you’re using the correct pieces. The recommended configuration requires eleven base plates for a standard 12-foot pool setup.
- Use stakes at every other rail to maintain a perfect circle shape, measuring the diameter at multiple points to prevent oval distortion
- Position 12″x12″x1″ patio blocks under each bottom plate, leaving approximately 1″ exposed inside the pool area
- Cross-reference track lengths with manufacturer charts and check that gaps between rails match specified measurements
Remember to secure the tracks without over-tightening, as this allows for necessary adjustments during wall installation.
Level Support Post Bases
With your bottom tracks properly positioned, leveling the support post bases becomes your next priority. Start by placing 12″×12″×1″ patio blocks under each support post location, ensuring they’re flush with the ground surface. Use a laser or bubble level to verify horizontal alignment between blocks, spacing them evenly every 4-6 feet around the pool perimeter.
For uneven terrain, install crushed gravel beneath the blocks for drainage, then add mason sand to fill any gaps. You’ll need to compensate for slopes using stackable leveling blocks or shims on the low sides. To enhance pool base stability, secure the support posts with anchor pins and install stabilizer bars between adjacent panels. Don’t forget to verify each base’s level and stability under pressure before proceeding with the wall installation.
Connect Frame Components Securely
Carefully inspect all frame components before starting assembly, ensuring each piece matches your pool’s specifications and shows no signs of damage. Begin securing frame connections by aligning T-plates and vertical supports at precise 90-degree angles. You’ll need to use 3/8″-16 hex head bolts and nuts for all major frame connections, following the manufacturer’s torque specifications to prevent warping or instability.
- Position vertical support posts at designated intervals, leaving specified holes open for future adjustments
- Overlap wall segments precisely, ensuring flush joints and proper alignment of skimmer openings
- Tighten all fasteners systematically, working in a consistent pattern to distribute stress evenly
Remember to maintain square corners throughout assembly and verify that all components remain level during the connection process. Don’t overtighten fasteners, as this can compromise the frame’s structural integrity.
Installing Pool Walls and Liner Components

Before starting the wall and liner installation, proper preparation of your components and work area is essential for success. You’ll need to verify the pool size, inventory parts, and make sure your site is properly leveled and drained. During wall assembly, attach foam protection and maintain proper alignment using temporary supports.
| Step | Wall Assembly | Liner Installation |
|---|---|---|
| 1 | Apply wall foam | Place floor pad |
| 2 | Install foam cove | Secure top edge |
| 3 | Align sections | Control tension |
| 4 | Check joints | Remove wrinkles |
| 5 | Verify circle | Test fit |
For liner installation, you’ll work systematically to prevent wrinkles and maintain proper tension. Start by laying the floor pad, then carefully position the liner while maintaining even pressure. Use specialized tools for corners and seams. Don’t forget to check for gaps between the liner and floor pad before proceeding with final adjustments.
Setting Up Filtration and Safety Equipment
Once you’ve completed the wall and liner installation, proper setup of your filtration system becomes critical for maintaining water quality and safety. Position your pump and filter components on stable, level ground near the pool’s perimeter, ensuring they’re accessible for maintenance while avoiding direct sunlight exposure. You’ll need to connect the plumbing components following the correct flow direction: skimmer to pump to filter to return jets.
- Install GFCI-protected outlets for all electrical equipment and verify proper grounding according to local codes
- Connect hoses using appropriate adapters and clamps, avoiding kinks while maintaining proper alignment between pump and filter
- Fill sand filters to manufacturer specifications and secure O-rings in all connections to prevent leaks
Remember to install isolation valves if your pump sits above water level, and set up programmable timers to automate filtration cycles.
Filling Your Pool and Final Landscaping
The success of your above-ground pool installation hinges on proper filling techniques and strategic landscaping choices. Fill your pool only during direct sunlight hours, managing thermal expansion by adding just 3 inches of water daily when temperatures are below 65°F, or up to 6 inches when warmer. Maintain strict control over water levels, completing the fill only after reaching the 24-inch mark.
For pool landscaping ideas, guarantee proper drainage with a slight grade away from the pool structure. Consider drought-resistant plants that won’t shed excessive debris, and incorporate hardscape elements for easy maintenance access. Apply water safety techniques by securing the liner edges and implementing regular structural inspections. Create an erosion control barrier using appropriate base materials while maintaining clear sightlines for peak pool monitoring.
Frequently Asked Questions
How Long Should I Wait Before Swimming After Filling the Pool?
Your waiting period after filling a pool depends on proper chemical treatment and water safety measures. You’ll need to run the pump for 24 hours while adding and circulating initial chemicals. Wait at least 4 hours after chlorine addition (ensuring levels drop below 5ppm), test all chemical levels, and confirm proper pH balance. Don’t swim until you’ve completed a full filtration cycle and verified safe chemical readings through testing.
What Chemicals Do I Need to Initially Balance the Pool Water?
To achieve proper chemical balance in your pool water, you’ll need five essential chemicals: chlorine sanitizer (1-3 ppm), pH balancers (soda ash or muriatic acid), alkalinity increaser (80-120 ppm), calcium hardness increaser (250-350 ppm), and cyanuric acid/stabilizer (30 ppm). Add these in sequence: total alkalinity first, then pH, followed by chlorine, and finally stabilizer. Always test between additions and wait 20 minutes for proper circulation.
Can I Install My Above-Ground Pool on a Concrete Patio?
Yes, you can install your above-ground pool on a concrete patio, but proper pool foundation preparation is essential. You’ll need to guarantee your concrete surface is completely level (within 1″ tolerance) and extends at least 1 foot beyond your pool’s diameter. You must install protective liner pads to prevent concrete contact damage. For concrete preparation, address any drainage slopes and verify the patio’s structural integrity before proceeding with installation.
How Do I Winterize My Above-Ground Pool in Cold Climates?
To winterize your above-ground pool in cold climates, you’ll need to focus on three critical steps. First, balance your water chemistry and add winterizing chemicals. Then, drain the water level to just below the skimmer and return jets, and thoroughly blow out all plumbing lines. Finally, secure a properly fitted pool cover to protect against winter debris. Don’t forget to install a cover pump for winter maintenance of accumulated snow and rainwater.
What Is the Average Lifespan of an Above-Ground Pool Liner?
You can expect your above-ground pool liner to last 6-10 years with proper pool liner maintenance. However, harsh conditions or poor care may reduce this to 5-9 years, while excellent upkeep could extend it to 20 years. Watch for liner replacement tips like monitoring pH levels, inspecting for cracks, and addressing wrinkles promptly. Regular chemical balancing and debris removal are essential for maximizing your liner’s lifespan. Consider proactive replacement if you notice persistent leaks or structural damage.