


Your Latham pool installation follows a precise 7-step timeline spanning 6-8 weeks. You’ll begin with a site assessment and design consultation, followed by permit applications and code compliance checks. Next, you’ll move through ground preparation, excavation, and shell installation phases. The process continues with plumbing and electrical integration, decking development, and concludes with final inspections and water chemistry balancing. Each phase requires specific technical expertise to guarantee your installation meets professional standards.
Key Takeaways
- Initial site assessment involves soil testing, design consultation, and permit requirements gathering, typically taking 1-2 weeks to complete.
- Ground preparation and excavation require precise measurements, soil removal, and establishing proper drainage patterns over 3-5 days.
- Professional installation teams carefully place and level the Latham fiberglass shell using specialized equipment and laser measurement tools.
- Plumbing and equipment setup includes installing filtration systems, pumps, skimmers, and return lines according to local building codes.
- Final inspection ensures proper water chemistry balance, equipment functionality, and safety features before allowing pool use.
Initial Site Assessment and Design Consultation

Before beginning any pool installation project, a thorough site assessment and professional design consultation must be conducted to guarantee ideal placement and construction feasibility. During this phase, you’ll work with Latham’s experts to evaluate your property’s unique characteristics and constraints.
The site evaluation includes analyzing soil composition, yard slope, drainage patterns, utility locations, and access points for construction equipment. You’ll need to provide property surveys and obtain information about local building codes and setback requirements. Your design preferences will be discussed in detail, covering pool size, shape, depth, and desired features like steps, benches, or tanning ledges. The consultant will help you select appropriate materials and finishes while ensuring your vision aligns with site conditions and local regulations.
Permit Application and Local Code Compliance

Once your pool design receives approval, you’ll need to navigate the critical permit application process required by your local municipality. Start by obtaining a thorough checklist of permit requirements from your city’s building department, which typically includes zoning restrictions, setback requirements, and safety regulations.
You’ll need to submit detailed documentation, including your pool’s engineering plans, electrical specifications, and plumbing diagrams. Local regulations may also require supplementary elements such as fencing specifications, equipment pad locations, and drainage plans. Most municipalities mandate specific safety features, including self-closing gates and pool covers.
Work closely with your Latham pool contractor to verify all submitted materials meet current building codes. Expect the permit review process to take 2-4 weeks, depending on your location and the complexity of your installation.
Ground Preparation and Excavation
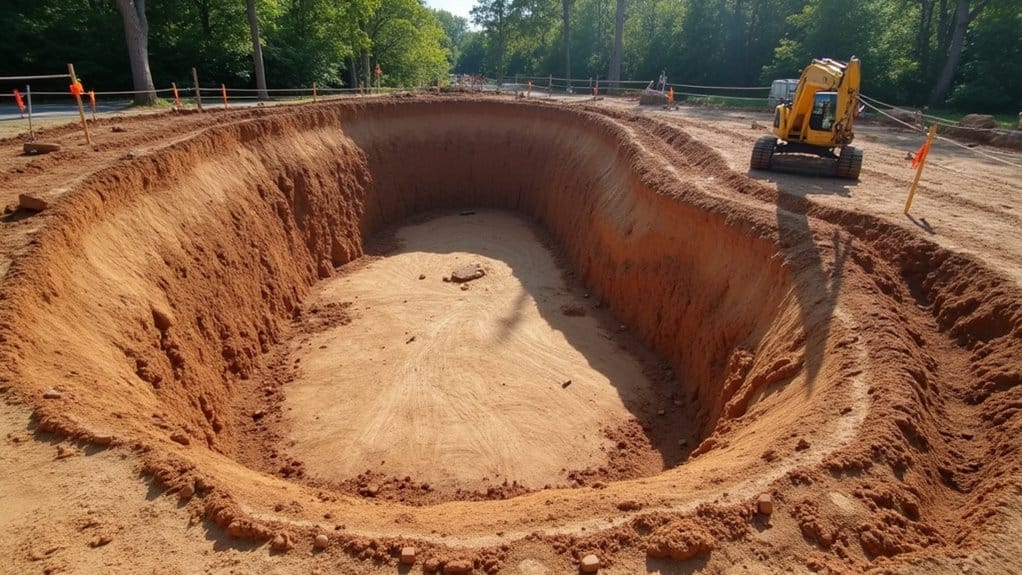
Proper ground preparation serves as the foundation for a successful Latham pool installation. You’ll need to begin with thorough soil testing to determine ground composition, water table levels, and load-bearing capacity. This analysis guarantees your pool’s long-term structural integrity and helps identify potential drainage issues.
During excavation, you’ll need to implement precise excavation techniques that match your pool’s specific dimensions and design. You’ll want to establish proper depth gradients, maintain accurate wall angles, and make sure the excavation area extends 2-3 feet beyond your pool’s planned perimeter. It’s essential to remove all organic material, rocks, and debris while maintaining stable soil conditions. You’ll also need to create appropriate access paths for heavy equipment and establish designated areas for extracted soil storage.
Pool Shell Installation and Equipment Setup
Following the completion of ground preparation, the pool shell installation marks a major milestone in your Latham pool project. The process involves precise coordination between your installation team and specialized equipment to guarantee proper placement of your fiberglass shell. After ground prep, installing the shell is a key step, highlighting the latest fiberglass pool innovations that ensure precise placement and long-lasting performance through advanced tools and techniques.
During this phase, you’ll experience these critical steps:
- Crane or excavator positioning of the pool shell into the excavated area, followed by careful leveling and adjustment using laser measurement tools
- Installation of plumbing systems, including main drains, skimmers, and return lines, connecting them to your pool’s filtration hub
- Setup of essential equipment components, such as the pump, filter, heater, and chlorination system, all mounted on a concrete pad according to local building codes
This phase typically requires 2-3 days of focused work by your installation team, weather permitting.
Plumbing and Electrical System Integration
While the pool shell sets in its final position, your installation team will begin the essential process of integrating the plumbing and electrical systems. The team will initially lay out the primary plumbing lines, connecting the skimmers, main drains, and return jets to create an efficient water circulation system. During this phase, they’ll conduct thorough pressure testing to verify all connections are leak-free.
Pump selection is vital for your pool’s size and features, and you’ll need to confirm that the electrical requirements align with local codes. Your electrician will install GFCI protection, bonding wires, and appropriate conduits for all electrical components. They’ll establish proper grounding systems and implement multiple electrical safety measures, including waterproof junction boxes and correctly sized circuit breakers. The entire electrical system must meet strict safety standards before moving forward with the installation process.
Decking and Landscaping Development
Once the pool’s structural elements are secure, you’ll need to establish the surrounding deck framework and initial landscaping parameters. Consider your decking materials carefully, as they’ll impact both aesthetics and functionality of your pool area. Your choices range from natural stone to composite materials, each offering distinct advantages for durability and maintenance.
- Select and install your preferred decking materials, ensuring proper slope for drainage and non-slip surface characteristics for safety
- Develop a thorough landscaping plan that incorporates both hardscape elements and strategic plant placement for privacy and shade
- Install irrigation systems and lighting fixtures before finalizing the landscaping options, positioning them to improve both functionality and ambiance
These elements work together to create a cohesive outdoor living space that complements your Latham pool while providing practical functionality for years to come.
Final Inspection and Water Chemistry Balance
Before you begin using your newly installed Latham pool, a thorough final inspection and precise water chemistry balance must be established. You’ll need to conduct detailed water testing and chemical adjustment procedures to guarantee safe swimming conditions.
| Parameter | Ideal Range |
|---|---|
| pH Level | 7.2 – 7.6 |
| Chlorine | 1.0 – 3.0 ppm |
| Alkalinity | 80 – 120 ppm |
| Calcium Hardness | 200 – 400 ppm |
| Stabilizer | 30 – 80 ppm |
Inspect all equipment for proper operation, including pumps, filters, and safety features. Check that skimmer baskets, returns, and drain covers are securely installed. Test all lighting systems and verify that automatic timers are correctly programmed. Once you’ve confirmed all systems are operational and water chemistry is balanced, you can officially begin enjoying your new Latham pool.
Frequently Asked Questions
How Much Will My Energy Bills Increase With a New Pool?
Your pool’s energy consumption will typically increase your monthly bills by $30-$150, depending on different factors. To conduct an accurate cost analysis, you’ll need to take into account your pool’s size, heating method, pump efficiency, and local utility rates. You can minimize costs by using a variable-speed pump, maintaining proper chemical balance, and employing a pool cover when not in use. Smart scheduling of pool equipment can further reduce energy expenses.
Can I Convert My Chlorine Pool to Saltwater Later?
Yes, you can convert your chlorine pool to saltwater at any time. The conversion process typically involves installing a salt chlorine generator system, which costs between $500-$2,500. You’ll need to add pool-grade salt and balance your water chemistry. Saltwater benefits include softer water, less eye and skin irritation, and reduced chemical maintenance. The entire conversion can be completed in 1-2 days by a professional or as a DIY project.
What Happens to My Pool Warranty if I Move?
When you move, your pool warranty typically stays with the pool and transfers to the new homeowner, not with you. You’ll want to provide all warranty documentation to the new owners during the sale process. Most manufacturers, including Latham, allow warranty transfers, but you’ll need to guarantee proper documentation of the transfer. Contact your pool manufacturer to understand specific transfer requirements and any potential limitations or fees that may apply.
How Often Should I Replace the Pool Liner?
You’ll typically need to replace your vinyl pool liner every 7-10 years, though proper pool maintenance can extend its lifespan. Signs that indicate it’s time for replacement include fading, brittleness, cracking, or stretching of the material. Factors affecting liner lifespan include water chemistry balance, UV exposure, and temperature fluctuations. You can enhance your liner’s durability by maintaining proper chemical levels and protecting it from sharp objects.
Can I Heat My Pool Year-Round in Cold Climates?
Yes, you can heat your pool year-round in cold climates, but it requires proper equipment and preparation. You’ll need a sturdy heating system, typically a heat pump or gas heater, combined with a high-quality pool cover to minimize heat loss. However, operating costs will be considerably higher during winter months. For ideal efficiency, consider installing solar panels to supplement your heating system and maintain water temperatures between 78-82°F throughout the year.