


Before painting your fiberglass pool, you’ll need proper safety gear including chemical-resistant gloves, respirator, and goggles. Drain and thoroughly clean the surface, then sand systematically using progressively finer grits (60-320). Choose a two-component epoxy paint system and apply during ideal weather conditions (50-85°F). Allow 4-7 days for curing before refilling. Success depends on meticulous preparation, proper application techniques, and understanding the detailed steps that follow. Once the paint cures, inspect for imperfections. If adding a new pool, install the fiberglass pool shell carefully to ensure long-term durability and performance.
Key Signs Your Fiberglass Pool Needs Repainting
While maintaining a fiberglass pool requires regular upkeep, certain telltale signs indicate when repainting becomes necessary rather than optional. The most obvious fading symptoms include dulling of the gel coat’s vibrancy due to UV exposure and chemical degradation. You’ll notice uneven discoloration patterns and stubborn stains that resist standard cleaning methods. Routine resurfacing maintenance can help prevent extensive structural damage and costly repairs down the line. Based on extensive pool forum discussions, many owners find that incorporating a Baja shelf adds significant value before undertaking a full repaint project.
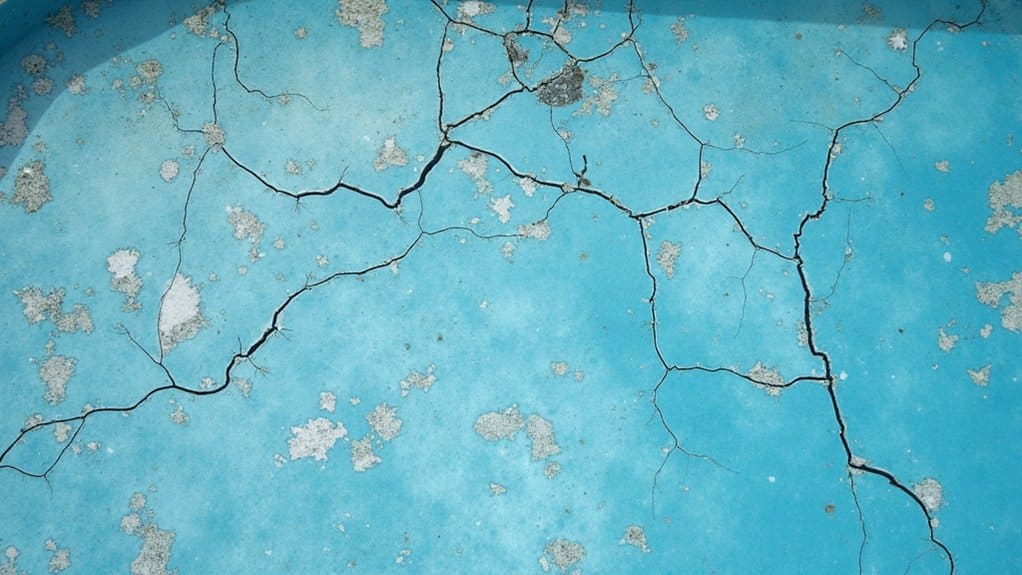
Watch for surface cracks, particularly spider-like fractures in the gel coat, and any signs of delamination where the protective barrier begins to separate. If you’re experiencing rough patches, especially around fittings and steps, or detecting persistent texture changes despite proper water chemistry maintenance, it’s time to repaint. Water chemistry that is not properly balanced can lead to calcium and pH issues that severely damage the pool surface. The typical lifespan of a fiberglass pool surface is 15-20 years, so consider repainting if you’re approaching this timeframe, especially with increased maintenance costs.
Essential Safety Precautions Before Starting
Before painting your fiberglass pool, you’ll need specific protective equipment including chemical-resistant gloves, safety goggles, non-slip boots, and a NIOSH-approved respirator rated for paint fumes. You must carefully read and follow all safety data sheets (SDS) for handling pool paint, cleaning solutions, and surface preparation chemicals, keeping these materials in their original containers and properly labeled. Since maintaining proper water chemistry helps protect fiberglass surfaces, thoroughly test and document your pool’s chemical levels before draining to establish a baseline for restoration. Proper ventilation is critical during the entire painting process, so you’ll need to set up industrial fans to maintain continuous airflow and prevent the accumulation of harmful vapors in the pool area. Since fiberglass pools can shift without water, ensure all groundwater is monitored and the project is completed within a week to prevent structural issues. For maximum safety during preparation, contact utility companies to verify the locations of any underground lines that could be affected by chemical runoff or drainage activities.
Protective Gear Requirements
Five essential pieces of protective equipment must be worn when painting a fiberglass pool. You’ll need both disposable and heavy-duty nitrile gloves to protect against resins and cleaning agents – switch between types based on your task. Confirm your respirator fits properly with chemical filters for resin fumes, while an N95 mask suffices for sanding work. Proper ventilation is critical when working with epoxy and polyurethane paints.
Anti-fog safety goggles with wraparound protection are vital to shield against chemical splashes and debris. Wear non-reactive long sleeves and pants, along with slip-resistant work boots to prevent accidents on wet surfaces. Your clothing should be sturdy enough to withstand abrasion during prep work.
Always inspect your gear before use, replace damaged items immediately, and maintain proper fit to guarantee maximum protection throughout the painting process.
Safe Chemical Handling Guidelines
Since proper chemical handling directly impacts both safety and results, you’ll need to implement strict protocols before beginning your fiberglass pool painting project. Chemical safety starts with maintaining proper ventilation and controlling your workspace environment, keeping temperatures between 50°F and 90°F. Weekly pH monitoring tests are crucial during the painting preparation phase to ensure optimal surface conditions. Always keep a first aid kit nearby when working with pool chemicals.
When handling muriatic acid, dilute it to a 50% concentration using a 1:1 ratio with water. Never mix acids with unauthorized chemicals, and perform acid neutralization with baking soda before disposal. Keep paint containers sealed when not in use to prevent contamination, and avoid working near open flames or sparks. You’ll need to monitor weather conditions carefully, postponing work during rain or fog. For spills, use absorbent materials immediately and dispose of all chemical waste according to local regulations. Don’t allow any residues to enter storm drains or waterways.
Surface Preparation and Cleaning Steps
Properly preparing your fiberglass pool’s surface determines the ultimate success of your paint job. Begin by completely draining the pool and power washing all surfaces with a 3200-psi washer to remove oils and debris. After scrubbing with a detergent solution, apply TSP to degrease the surfaces thoroughly. Handheld sanding only is recommended for the best surface preparation results.
For surface cleaning and chemical etching, you’ll need to sand the fiberglass rather than using muriatic acid. Once sanded, flush the surface repeatedly with a garden hose until all residual particles are removed. A professional long-term savings comes from doing thorough surface preparation. You’re aiming for a medium-grade sandpaper texture that’ll guarantee proper paint adhesion. Synthetic rubber paint provides excellent coverage for fiberglass surfaces.
Before proceeding, inspect for cracks and structural damage, making necessary epoxy repairs. Allow the surface to dry completely and conduct a condensation test by taping plastic sheeting to detect any moisture issues. Don’t forget to wear protective gear throughout the process.
Proper Sanding Techniques for Optimal Results
Proper sanding creates the ideal surface profile you’ll need for paint adhesion on your fiberglass pool. You’ll achieve excellent results by selecting the correct grit progression, starting with 60-80 grit and working up to 220 grit, while maintaining consistent directional patterns throughout the process. When sanding problem areas like edges and curves, you’ll need to adjust your technique and tools accordingly, using flexible sanding materials and careful hand-sanding to guarantee uniform coverage.
Choose Correct Grit Size
Selecting the right grit size sequence forms the foundation of a successful fiberglass pool painting project. Your grit selection strategy should begin with coarse P80-P120 grits to remove old coatings and major imperfections. For severely damaged areas, you’ll want to start with P40-P60. Lower grit numbers work more aggressively on surfaces, removing material faster.
Progress systematically through medium grits (P150-P220) to smooth the surface and create favorable paint adhesion conditions. Wet sanding is recommended to minimize dust and extend sandpaper life. Complete your sanding techniques with fine P240-P320 grits for final preparation. Use silicon carbide sandpaper for optimal results on fiberglass surfaces. Don’t skip more than two grit sizes between steps to guarantee proper surface refinement.
Remember to maintain consistent sanding direction throughout the process and clean thoroughly between grit changes. This methodical approach prevents cross-hatching, guarantees even coverage, and creates the perfect surface for your new pool coating.
Master Directional Sanding Patterns
With your grit sequence established, mastering directional sanding patterns becomes your next key focus. Ideal patterns require unidirectional sanding to improve adhesion and create stronger bonds between the surface and paint. Maintain consistent, parallel sanding grooves while making overlapping passes to prevent uneven wear.
To achieve the best results, you’ll need to avoid common technique mistakes. Don’t cross-hatch your sanding patterns, as this greatly weakens adhesion. Apply even pressure throughout the process and stick to the same grit for each complete pass. Check your work under bright light to spot any irregularities in the surface texture. Your final surface should display a uniform scratch pattern with no directional variations this consistency guarantees maximum paint adhesion and a professional finish.
Sanding Problem Areas Effectively
Successfully addressing problem areas in fiberglass pool surfaces demands systematic attention to detail and precise sanding techniques. Begin by identifying blisters, cracks, and damaged areas that require focused treatment. Start with 60-80 grit sandpaper to remove old coatings and compromised material, then progress to 120 grit for feathering repair edges.
When tackling repairs, you’ll need to maintain proper grit progression, moving from coarse to fine without skipping grades. After applying repair compounds, sand in circular motions initially, then switch to following the direction of fiberglass strands with 220 grit for final smoothing. Use hand sanders or blocks for better control, especially around curved sections. Between sanding stages, wipe surfaces with solvent to remove residue and guarantee you’re achieving consistent, professional results.
Choosing the Right Paint and Equipment
The right combination of paint and equipment forms the foundation for a successful fiberglass pool restoration project. You’ll need to select a two-component epoxy paint system, which offers superior adhesion and chemical resistance while covering approximately 500 square feet per gallon. Hot temperatures should be avoided during application to prevent paint blistering and surface defects.
Start with a gunzite or specialized epoxy primer to guarantee proper paint bonding and prevent delamination. This vital step helps fill minor surface imperfections and extends your paint’s lifespan to 6-8 years. For application, you’ll require high-quality rollers, brushes, mixing containers, and fine-grit sandpaper. Don’t forget essential safety equipment like goggles and masks to protect against chemical exposure.
Your epoxy paint choice should match your pool’s aesthetic while providing durability against UV rays, chlorine, and regular wear from automatic cleaners and foot traffic.
Weather Conditions and Timing Considerations
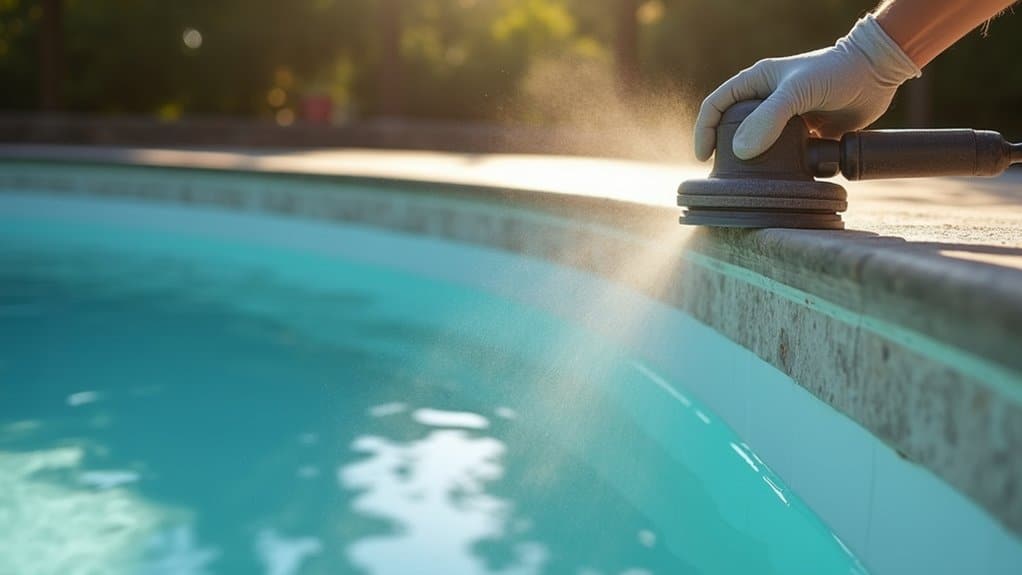
Proper weather conditions play a decisive role in achieving ideal results when painting your fiberglass pool. Temperature and humidity are critical weather impact factors, with best application occurring between 50-85°F. You’ll need to monitor forecasts for at least three days post-application to guarantee uninterrupted curing.
Your timing strategies should focus on scheduling work during stable weather windows, particularly in mild morning hours. Don’t paint during rain, fog, or high humidity, as these conditions will compromise paint adhesion. If rain threatens, you’ll need to cover the pool immediately with waterproof tarps. Allow 4-7 days of curing time before filling the pool, though some products may permit faster filling in hot weather. Always verify manufacturer guidelines for specific temperature thresholds and curing requirements for your chosen paint.
Step-by-Step Painting Application Guide
When undertaking a fiberglass pool painting project, following a systematic application process guarantees ideal adhesion and longevity of your coating system. Start by draining and thoroughly cleaning your pool’s surface, followed by essential repairs and acid etching to verify proper paint bonding.
Once you’ve completed surface preparation, apply an epoxy primer using precise painting techniques, working from the deep end toward the shallow end. After the primer cures, mix your chosen color selection with hardener and apply the base coat systematically. You’ll need to maintain consistent thickness while applying 2-4 subsequent coats, using rollers for large areas and brushes for detailed work.
Allow proper curing time between coats and wait 4-7 days before refilling. Balance your pool’s chemistry immediately after filling to protect the new finish.
Post-Painting Care and Curing Process
Following your pool’s painting completion, successful curing requires careful attention to environmental conditions and strict adherence to manufacturer specifications. You’ll need to implement proper curing techniques while maintaining temperatures between 60-85°F and humidity levels below 75%. Regular post curing inspection helps identify potential issues early.
Proper pool paint curing demands precise temperature control, low humidity, and diligent monitoring to prevent issues and ensure lasting results.
- Monitor ambient temperature and humidity using appropriate measuring tools
- Protect the surface from rain, direct sunlight, and external moisture
- Wait the full manufacturer-specified curing period before refilling
- Maintain balanced water chemistry (pH 7.2-7.6) during refill
- Avoid abrasive cleaning tools for 30 days after curing
During the initial weeks, document all maintenance activities in a logbook for warranty purposes. You’ll need to test circulation systems after refilling and limit heavy pool use until the surface has completely cured, typically 1-2 weeks post-application.
Long-Term Maintenance Strategies
Once your painted fiberglass pool has fully cured, implementing thorough long-term maintenance strategies will protect your investment and extend its lifespan. Your long-term upkeep should focus on both surface protection and water chemistry management. When installing fiberglass pools, understand their specific maintenance needs. Regular cleaning, inspections, and balanced water chemistry prevent stains, damage, and buildup, keeping your pool in top shape for years.
Establish a consistent maintenance routine that includes twice-weekly brushing with soft bristles and vacuum cycles to prevent algae buildup and staining. Monitor pH and sanitizer levels weekly, making adjustments only when necessary to avoid chemical stress on the paint. You’ll need to pay special attention to UV exposure by using protective covers in highly exposed areas. During seasonal shifts, particularly before winter, guarantee proper winterization by partially draining, adding appropriate chemicals, and protecting equipment from freeze damage. Schedule annual professional inspections to catch potential issues before they compromise your pool’s painted surface.
Frequently Asked Questions
Can I Paint My Fiberglass Pool While It Still Has Water?
No, you can’t paint your fiberglass pool while it contains water. Proper water removal is crucial for successful painting techniques. You’ll need to completely drain and dry your pool before beginning any surface preparation. Standing water compromises paint adhesion, prevents proper sanding, and interferes with the curing process. Additionally, hydrostatic pressure from partial draining can damage your pool’s structure. For best results, guarantee a completely dry surface before painting.
What Happens if It Rains Shortly After Painting the Pool?
If it rains shortly after painting your pool, you’ll face potential rain damage that can seriously compromise paint adhesion. You’ll notice issues like blistering, staining, or uneven curing where the rainwater contacts wet paint. If you’re using acrylic paint, you’re at higher risk than with epoxy formulations. You’ll need to act quickly by covering the pool with tarps to protect the surface. In severe cases, you might need to repaint affected areas.
Should I Repair Fiberglass Cracks Before or After Painting?
You must repair all fiberglass cracks before painting your pool. Begin with a thorough crack assessment to identify both visible and hidden structural issues. Apply appropriate repair techniques using specialized epoxy resins and fiberglass materials to restore the pool’s integrity. If you paint over unrepaired cracks, you’ll risk paint failure, water seepage, and worsening structural damage. Don’t skip this vital step – proper crack repairs guarantee your paint job’s longevity and your pool’s durability.
How Much Paint Do I Need for an Average-Sized Pool?
You’ll need to calculate your pool’s total surface area by measuring floor dimensions (length × width) and wall areas (depth × length + depth × width). For a standard 30′ × 15′ × 5′ pool, you’re looking at roughly 900 sq ft total. With paint coverage rates of 130-300 sq ft per gallon depending on your paint type, you’ll need 3-7 gallons for a single coat. Don’t forget to account for multiple coats if required.
Can I Use Leftover Paint From My Previous Pool Painting Project?
You can use leftover pool paint only if it meets strict quality and storage criteria. Check for paint compatibility with your pool’s existing coating and guarantee it’s the same epoxy-based formulation. Examine the paint’s durability by verifying there’s no separation, clumping, or changes in viscosity. If it’s been stored properly in a sealed container away from heat and moisture, and it’s within its shelf life (typically 6-12 months), you may proceed.